Quantcast
Channel: rtrouton – Der Flounder
Viewing all 764 articles
Browse latest View live

Mad, bad and possibly dangerous – a cautionary tale of software installation

$
0
0

In my career, I’ve run across a lot of terrible installers in a variety of forms. The one I ran across today though is noteworthy enough that I want to point it out because of the following reasons:

  1. It’s an installer application. I have opinions on those.
  2. It’s for a security product where, as part of the installation, you need to provide the username and password for an account on the Mac which has:
    • Administrator privileges
    • Secure Token

Note: I have no interest in talking to the vendor’s legal department, so I will not be identifying the vendor or product by name in this post. Instead, I will refer to the product and vendor in this post as “ComputerBoat” and leave discovery of the company’s identity to interested researchers.

For more details, please see below the jump.

To install ComputerBoat, you will need the following:

  1. The ComputerBoat installer application.
  2. A configuration file for the ComputerBoat software.
  3. The username and password of an account with the following characteristics:
    • Administrator privileges
    • Secure Token

Once you have those, you can run the following command to install ComputerBoat:

Why it necessary to provide the username and password of an account with admin and secure token? So this product can set up its own account with admin privileges and a Secure Token!

Why is it necessary for this product to set up its own account with admin privileges and a Secure Token? I have no idea. Even if it is absolutely necessary for that service account to exist, there is no sane reason why an application’s service account needs a Secure Token. In my opinion, there are only three reasons why a service account may need to have Secure Token.

  1. To add the service account to the list of FileVault-enabled users.
  2. To enable the service account to create other accounts which have Secure Tokens themselves.
  3. To enable the service account to rotate FileVault recovery keys.

All of those reasons have serious security implications. Even more serious security implications are brought up by the fact that this vendor thought requesting the username and password of an account with admin and secure token was an acceptable part of an installation workflow. To further illustrate this, here’s a sample script which the vendor provided for installation using Jamf Pro:

Here, the installation workflow is as follows:

  1. Use curl to download a compressed copy of the ComputerBoat installer’s configuration file in .zip format.
  2. Use ditto to unzip the dowloaded configuration file into a defined location on your Mac.
  3. Use ditto to unzip the downloaded installer into the same defined location on this Mac.
  4. Run a directory listing of the defined location.
  5. Remove extended attributes from the uncompressed ComputerBoat installer application.
  6. Using credentials for an admin account with Secure Token, install the ComputerBoat software and set up a new account with a Secure Token to act as the application’s service account.
  7. Checks to see if it can run a command to get the newly-installed application’s version number.
    • A. If the version number comes back, the install succeeded. 
    • B. If nothing comes back, the installation is reported as having failed.

The only defense I can think of for the vendor is that it says “Sample” in the description. That may imply that the vendor built this as a proof of concept and may be trying to subtly encourage their customer base to develop better solutions for deploying the ComputerBoat software on Macs. On the other hand, I received this script on the customer end of the transaction. That meant that someone at the vendor thought this was good enough to give to a customer. Either way, it’s not a good look.

Why is this script problematic?

Security problems

  1. You need to supply the username and password on an account on the Mac with admin privileges and Secure Token using a method that other processes on the computer can read. This leaves open the possibility that a malicious process will see and steal that username and password for its own ends.
  2. The script is set to run in debug mode, thanks to the set -x setting near the top of the script. While this may be helpful in figuring out why the installation process isn’t working, the verbose output provided by debug mode will include the username and password of the account on the Mac with admin privileges and Secure Token.


Installation problems

1. Without supplying the username and password on an account on the Mac with admin privileges and Secure Token, the installation process does not work.

If you’re deploying this security application to your fleet of Macs, that means that the vendor has made the following assumptions:

  • You have an account with admin privileges and Secure Token on all of your Macs which share the same username and password.
  • You’re OK with providing these credentials in plaintext, either embedded in the script or provided by a Jamf Pro script parameter in a policy.

2. Without providing a separate server to host the ComputerBoat installer’s configuration file, the installation process does not work.

  • If you’re deploying this software, the vendor apparently did not think of using Jamf Pro itself as the delivery mechanism for this configuration file. Hopefully you’ve got a separate web server or online file service which allows for anonymous downloading of a file via curl.

3. Without figuring out a way to get the installer into the same location as the downloaded configuration file, the installation process does not work.

  • Overlooked by the installation script is this question: How does the installer get to the location defined in the script as $COMPUTERBOATEPM_INSTALL_TMP ? The script assumes it’ll be there without including any actions to get it there or checking that it is there.

There are further issues with this script, but they fall into the category of quirks rather than actual problems. For example, I can’t figure out the purpose of the following lines:

ls -al $COMPUTERBOATEPM_INSTALL_TMP
xattr -d $COMPUTERBOATEPM_INSTALL_TMP/Install\ ComputerBoat\ EPM.app

Neither command seems to do something useful. The first one will list the contents of the directory with the configuration file and the installer application, but then that information isn’t captured or used anywhere. The second removes extended attributes from the ComputerBoat installer application, but the reason for this removal isn’t explained in any way.

You can draw conclusions about a vendor and their product quality by looking at how that vendor makes it possible to install their product. In examining this installation process, especially considering this is for a product intended to improve security in some way, I have drawn the following conclusions:

  1. The vendor has not invested resources in building macOS development or deployment expertise.
  2. The vendor is unwilling or unable to avoid compromising your security with their product’s installation process.
  3. The vendor is not serious about developing or maintaining a quality product for macOS.

When you see installation practices like this, I recommend that you draw your own conclusions on whether this is a vendor or a product you should be using.


Deleting all Jamf Pro policies in a specified category

$
0
0

Every so often, I need to delete a bunch of Jamf Pro policies at once. One convenient way I’ve found to do this is to assign all the policies I want to delete to one category which doesn’t have any other policies assigned to it. Once assigned, I can then use the API to delete them all at once.

To assist with this task, I’ve been using a script written by Jeffrey Compton but over time I found that I wanted more functionality. To meet my own needs, I took Jeffery’s original idea and written my own script to target the policies in a particular Jamf Pro category. For more details, please see below the jump.

This script is designed to do the following:

  1. List all categories on a Jamf Pro server.
  2. Allow a category to be specified.
  3. List all policies (if any) associated with that category.
  4. Confirm that all policies in that category should be deleted.
  5. Delete all policies in that category.

For authentication, the script can accept hard-coded values in the script, manual input or values stored in a ~/Library/Preferences/com.github.jamfpro-info.plist file.

The plist file can be created by running the following commands and substituting your own values where appropriate:

To store the Jamf Pro URL in the plist file:

defaults write com.github.jamfpro-info jamfpro_url https://jamf.pro.server.goes.here:port_number_goes_here

To store the account username in the plist file:

defaults write com.github.jamfpro-info jamfpro_user account_username_goes_here

To store the account password in the plist file:

defaults write com.github.jamfpro-info jamfpro_password account_password_goes_here

When the script is run, you should see output similar to that shown below.

You’ll be requested to enter the name of a category.

Screen Shot 2020 06 08 at 3 10 47 PM


You’ll be asked to confirm that you want to delete the relevant policies.

Screen Shot 2020 06 08 at 3 11 46 PM


Once confirmed, the policies will be deleted.

Screen Shot 2020 06 08 at 3 12 42 PM

The script is available from following address on GitHub:

https://github.com/rtrouton/rtrouton_scripts/tree/master/rtrouton_scripts/Casper_Scripts/Jamf-Pro-Delete-All-Policies-In-Specified-Category

Videos from Penn State MacAdmins Campfire Sessions 2020

$
0
0

The good folks at Penn State have begun posting session videos from the Penn State MacAdmins Campfire Sessions to YouTube. As they become available, you should be able to access them via the link below:

https://www.youtube.com/user/psumacconf/videos

I’ve linked my “Introduction to MDM and Configuration Profiles” session here:

My colleague Anthony Reimer’s “Things I Learned from the Autopkg Maintainers” session is likewise available here:

Allowing external boot drives for T2-equipped Macs

$
0
0

With WWDC 2020 only a couple of weeks away, a number of folks are preparing to run the new beta version of macOS. While some will choose to go all-in and run the new OS on their main boot drive, others will prefer to install the new OS onto an external drive. However, for Macs equipped with T2 chips, there’s an extra step involved with allowing your Mac to boot from an external drive. For more details, please see below the jump.

Apple has a KBase article describing how to use the Startup Security Utility in macOS Recovery [] to allow booting from external media (AKA an external drive.) This KBase article is available via the link below:

About Startup Security Utility: https://support.apple.com/HT208198

To open Startup Security Utility:

1. Boot to macOS Recovery
2. Authenticate if requested.

Macos catalina recovery mode auth installer password

3. Under the Utilities menu, select Startup Security Utility.

Screen Shot 2020 06 13 at 12 36 11 PM

4. If requested to authenticate, click the Enter macOS Password button.

Screen Shot 2020 06 13 at 12 36 25 PM

5. Choose an administrator account and provide the account’s password.

Screen Shot 2020 06 13 at 12 36 37 PM

Once authenticated, select the Allow booting from external or removable media option.

Screen Shot 2020 06 13 at 12 36 50 PM

To illustrate, I’ve made a video showing the described process.

Using an Activation Lock bypass code from Jamf Pro to clear Activation Lock on a Mac

$
0
0

As part of macOS Catalina, Apple introduced Activation Lock for Macs. As on iOS, Activation Lock is an anti-theft feature designed to prevent activation of a Mac if it’s lost or stolen.

Activation Lock on Macs does have some requirements in order for it to work. The Mac must:

  • Run macOS Catalina or later
  • Use the Apple T2 Security chip
  • Two-factor authentication must be enabled on the Apple ID used for enable Activation Lock.
  • Secure Boot must be enabled with Full Security settings and Disallow booting from external media selected.

Screen Shot 2020 06 18 at 3 40 31 PM


Once these requirements are satisfied, Activation Lock is automatically enabled when Apple’s Find My service is enabled.

However, having Activation Lock turn on when Find My is enabled can lead to situations where it’s enabled by an employee on company-owned equipment. When this happens, companies, schools or institutions need a way to bypass Activation Lock without needing to know anything about the Apple ID used by the employee.

To provide this bypass, Apple has made it possible for companies, schools and institutions to use their MDM solution to clear Activation Lock. For more details, please see below the jump:

In order to clear Activation Lock using a MDM, the Mac in question needs to be supervised, which has the following requirements. The Mac must:

If a Mac is supervised and managed via Jamf Pro 10.20.0 or later, an Activation Lock bypass code is automatically generated and stored as part of the computer’s inventory. It’s available in the computer’s inventory listing, under the Management section.

Screen Shot 2020 06 19 at 5 21 39 PM


Note: This Activation Lock bypass code capability is not exclusive to Jamf Pro; it’s available to all MDM solutions. If your MDM solution does not yet support it, ask your vendor to add this support.

To use the Activation Lock bypass code, please use the following procedure:

1. Get the bypass code from Jamf Pro.

Screen Shot 2020 06 19 at 5 07 07 PM

2. Boot to macOS Recovery or Internet Recovery .
3. Make sure your Mac is able to communicate with the Internet and the required Apple services.
3. At the Activation Lock screen, go to the Recovery Assistant menu and select Activate with MDM key…

Screen Shot 2020 06 19 at 7 15 45 PM

4. Enter the bypass code and click the Next button.

Screen Shot 2020 06 19 at 7 15 57 PM


Once the bypass code has been accepted, the Mac should clear the activation lock and activate.

Screen Shot 2020 06 19 at 7 16 07 PM

To illustrate, I’ve made a video showing the described process.

WWDC 2020 notes

$
0
0

This week, I’m attending Apple’s WWDC 2020 conference from the comforts of home. As part of this, I’m taking notes during the labs and session videos. Due to wanting to stay on the right side of Apple’s NDA, I’ve been posting my notes to Apple’s developer forums rather than to here.

To make it easier for Mac admins to access them, I’ve set up a post in the forums where I’ve linking the various forum posts with my notes. It’s available via the link below:

https://developer.apple.com/forums/thread/650135

create_macos_vm_install_dmg updated for macOS Big Sur installer disk images

$
0
0

As part of testing macOS Big Sur 11.0.0, I’ve updated my create_macos_vm_install_dmg script. For more details, please see below the jump.

    Downloading the script:

The create_macos_vm_install_dmg script is available from the following location:

https://github.com/rtrouton/create_macos_vm_install_dmg

    Using the script:

Once you have the script downloaded, run the create_macos_vm_install_dmg script with two arguments:

  1. The path to an Install macOS.app.
  2. An directory to store the completed disk image in.

Example usage:

If you have a macOS Big Sur Beta installer available, run this command:

/path/to/create_macos_vm_install_dmg.sh "/Applications/Install macOS Beta.app" /path/to/output_directory

Screen Shot 2020 06 28 at 4 58 36 PM

Screen Shot 2020 06 28 at 5 01 38 PM

If you had chosen to not create the .iso file, this should produce a .dmg file inside output_directory that’s named something similar to macOS_1100_installer.dmg.

(Note: the WWDC beta identifies itself as 10.16, so a disk image of Big Sur’s WWDC beta will be named macOS_1016_installer.dmg.)

If you chose to create the .iso disk image, you should have two files inside the chosen directory: macOS_1100_installer.dmg and macOS_1100_installer.iso

Screen Shot 2020 06 28 at 5 02 46 PM

    Creating a VM with the OS installer disk image using VMware Fusion 11.x

1. Launch VMWare Fusion 11.x

2. In VMWare Fusion, select New… under the File menu to set up a new VM

3. In the Select the Installation method window, select Install from disc or image.

Screen Shot 2020 06 28 at 5 06 34 PM

4. In the Create a New Virtual Machine window, click on Use another disc or disc image…

Screen Shot 2020 06 28 at 6 11 45 PM

5. Select your macOS installer disk image file and click on the Open button.

Screen Shot 2020 06 28 at 5 07 31 PM

6. You’ll be taken back to the Create a New Virtual Machine window. Verify that the disk image file you want is selected, then click the Continue button.

Screen Shot 2020 06 28 at 5 07 47 PM

6. In the Choose Operating System window, set OS as appropriate then click the Continue button.

In this example, I’m setting it as follows:

  • Operating System: Apple OS X
  • Version: macOS 10.15

Screen Shot 2020 06 28 at 5 08 13 PM

7. In the Finish window, select Customize Settings if desired. Otherwise, click Finish.

Screen Shot 2020 06 28 at 6 05 55 PM

8. Save the VM file in a convenient location.

Screen Shot 2020 06 28 at 6 04 56 PM

The VM is now configured and set to use the macOS installer disk image. To install macOS, start the VM and then run through the normal installation process when prompted.

Enabling diagnostic logging for Microsoft Outlook 2019

$
0
0

I was recently asked for assistance with a way to enable diagnostic logging for Microsoft Outlook 2019 for macOS:

I had seen Microsoft’s KBase article on how to do it, where it references enabling logging via the Outlook preferences:

https://support.microsoft.com/en-us/help/2872257/how-to-enable-logging-in-outlook-for-mac

However, the KBase article only references how to enable this logging via the GUI and does not show how to do this via the command line. Fortunately my colleague @golby knew which settings could enabled from the command line to produce the requested logging. For more details, please see below the jump:

The following defaults command can be run to enable Outlook’s diagnostic logging for the logged-in user:

defaults write com.microsoft.Outlook LogForTroubleshooting -bool TRUE

The following defaults command can be run to disable Outlook’s diagnostic logging for the logged-in user:

defaults write com.microsoft.Outlook LogForTroubleshooting -bool FALSE

Once the logging is enabled, the logs are stored in the following location:

/Users/username_goes_here/Library/Containers/com.microsoft.Outlook/Data/Library/Logs/

To help with enabling the logging, I’ve built a configuration profile to enable the logging. It’s available via the link below:

https://github.com/rtrouton/profiles/tree/master/EnableMicrosoftOutlookLogging


PkgSigner AutoPkg processor updated for Python 3

$
0
0

A while back, I discussed how to incorporate installer package signing into AutoPkg workflows. The PkgSigner processor used in this workflow was originally written by Paul Suh and it uses Apple’s productsign tool to access a Developer ID Installer certificate stored in the login keychain.

Like other processors and AutoPkg itself, PkgSigner needed updating to Python 3 when Python 2 reached end-of-life in April 2020. This updating process has been completed, thanks to Nick McDonald. To make sure PkgSigner is consistently using the same Python environment across machines, PkgSigner has also been set to use the Python 3 install bundled with AutoPkg.

For those who need it, I have a copy of the PkgSigner processor available via the link below:

https://github.com/rtrouton/AutoPkg_Processors/tree/master/PkgSigner

Running recoverydiagnose in macOS Recovery

$
0
0

Most Mac admins, especially those who file bug reports or who work with AppleCare Enterprise, are familiar with running the sysdiagnose tool to gather diagnostic information about a Mac they’re working on. Running sysdiagnose will trigger a large number of macOS’s performance and problem tracing tools and use their reports to assemble what amounts to a snapshot of your Mac’s complete state at the time you ran the sysdiagnose tool, which can be very useful to developers trying to trace down why a particular problem is occurring.

However, this tool only applies to a Mac’s regular OS. What if the problem you’re seeing is in the macOS Recovery environment? In that case, you can run the recoverydiagnose tool in macOS Recovery to gather similar data specifically for macOS Recovery-related problems. For more details, please see below the jump.

Note: macOS Recovery uses read-only storage and you won’t be able to save anything to it. As a consequence, you will need to have writable storage available to store the data which is being assembled and stored by the recoverydiagnose tool. This can be an external USB or Thunderbolt drive or even network storage, depending on what’s available.

Running recoverydiagnose

1. Boot to macOS Recovery

Screen Shot 2020 08 06 at 4 32 47 PM

2. Connect storage that you can read and write to.

3. Open Terminal.

Screen Shot 2020 08 06 at 4 32 58 PM

4. Run the recoverydiagnose tool and specify where you want to store the assembled data.

Normally, you would run a command similar to the one below:

recoverydiagnose -f /path/to/logging/directory

For example, if you have an attached USB drive named Data and want to store the data there, the command would look like this:

recoverydiagnose -f /Volumes/Data

Information about what data is being gathered will be displayed and give you the chance to opt out.

Screen Shot 2020 08 06 at 4 29 21 PM


If you choose to continue, recoverydiagnose will gather its data and store it in the specified destination.

Screen Shot 2020 08 06 at 4 30 04 PM


For more information about this tool, run the recoverydiagnose command without specifying any options. This will trigger the recoverydiagnose documentation to be displayed.

Screen Shot 2020 08 06 at 4 28 12 PM

Speaking at Jamf Nation User Conference 2020

$
0
0

I’ll be speaking about how SAP transitioned to an at-home workforce this year at Jamf Nation User Conference 2020, which is being held online from September 29th – October 1st, 2020. For those interested, my talk will be on Tuesday, September 29th from 12:30pm – 1:00pm CDT.

For a description of what I’ll be talking about, please see the SAP in the Haus – How SAP transitioned its global workforce to working from home session description. You can see the whole list of JNUC sessions here on the Sessions page.

If you haven’t already signed up, the conference is free and there’s still time to register. You can do that via the link below:

https://www.jamf.com/events/jamf-nation-user-conference/2020/registration/

Uninstalling macOS system extensions

$
0
0

With the ongoing change from kernel extensions to system extensions, one new thing Mac admins will need to learn is how to uninstall system extensions. Fortunately, Apple has provided a tool as of macOS Catalina that assists with this: systemextensionsctl

If you run the systemextensionsctl command by itself, you should get the following information about usage:

systemextensionsctl: usage:
	systemextensionsctl developer [on|off]
	systemextensionsctl list [category]
	systemextensionsctl reset  - reset all System Extensions state
	systemextensionsctl uninstall  ; can also accept '-' for teamID

The last verb, uninstall, is what allows us to remove system extensions. For more details, please see below the jump.

To uninstall a system extension using systemextensionsctl, you need to provide the following:

  • Team identifier of the certificate used to sign the system extension
  • Bundle identifier for the system extension

Locating Team and bundle identifiers

You can identify team and bundle identifiers by locating the system extension in question inside the application and running the following commands:

To identify the Team identifier:

codesign -dvvv /path/to/name_goes_here.systemextension 2>&1 | awk -F= '/^TeamIdentifier/ {print $NF}'

To identify the bundle identifier:

codesign -dvvv /path/to/name_goes_here.systemextension 2>&1 | awk -F= '/^Identifier/ {print $NF}'

For example, Microsoft Defender ATP currently has several system extensions within its application bundle:

  • /Applications/Microsoft Defender ATP.app/Contents/Library/SystemExtensions/com.microsoft.wdav.epsext.systemextension
  • /Applications/Microsoft Defender ATP.app/Contents/Library/SystemExtensions/com.microsoft.wdav.netext.systemextension
  • /Applications/Microsoft Defender ATP.app/Contents/Library/SystemExtensions/com.microsoft.wdav.tunnelext.systemextension

To find the bundle identifier for the com.microsoft.wdav.epsext.systemextension system extension, run the command shown below:

codesign -dvvv "/Applications/Microsoft Defender ATP.app/Contents/Library/SystemExtensions/com.microsoft.wdav.epsext.systemextension" 2>&1 | awk -F= '/^Identifier/ {print $NF}'

That should give you the following output:

username@computername ~ % codesign -dvvv "/Applications/Microsoft Defender ATP.app/Contents/Library/SystemExtensions/com.microsoft.wdav.epsext.systemextension" 2>&1 | awk -F= '/^Identifier/ {print $NF}'
com.microsoft.wdav.epsext
username@computername ~ %

To find the Team identifier for the com.microsoft.wdav.epsext.systemextension system extension, run the command shown below:

codesign -dvvv "/Applications/Microsoft Defender ATP.app/Contents/Library/SystemExtensions/com.microsoft.wdav.epsext.systemextension" 2>&1 | awk -F= '/^TeamIdentifier/ {print $NF}'

That should give you the following output:

username@computername ~ % codesign -dvvv "/Applications/Microsoft Defender ATP.app/Contents/Library/SystemExtensions/com.microsoft.wdav.epsext.systemextension" 2>&1 | awk -F= '/^TeamIdentifier/ {print $NF}'
UBF8T346G9
username@computername ~ %

Uninstalling a system extension

Once you have both, you can run the following command with root privileges to uninstall a system extension:

systemextensionsctl uninstall Team_Identifier_Goes_Here Bundle_Identifier_Goes_Here

For example, if you wanted to uninstall Microsoft Defender’s com.microsoft.wdav.epsext.systemextension system extension, you would run the following command with root privileges:

systemextensionsctl uninstall UBF8T346G9 com.microsoft.wdav.epsext

Note: As of September 1, 2020, running the systemextensionsctl uninstall command requires System Integrity Protection (SIP) to be disabled. This limitation is supposed to be removed by Apple at some point in the very near future.


Clearing failed MDM commands on Jamf Pro

$
0
0

For a variety of reasons, MDM commands sent out from an MDM server can fail to run correctly on a Mac. Many times, these MDM commands will not be re-sent unless the failure is cleared. With the failure cleared, the MDM server will not have a record of sending the MDM command and should try again.

On Jamf Pro, there’s a couple of ways you can clear failed MDM commands. The first is a manual process which uses the Jamf Pro admin console. The second uses the Jamf Pro Classic API and can be automated. For more details, please see below the jump.

Clearing failed MDM commands using the Jamf Pro admin console

To clear failed MDM commands using the admin console, please use the procedure shown below.

1. Run a search for the computers you want to clear.

Note: If you search with no criteria, the search results will list all Macs enrolled with the Jamf Pro server.

2. Once you have the desired list, click the Action button.

Screen Shot 2020 09 11 at 5 09 10 PM

3. Select Cancel Remote Commands and click the Next button.

Screen Shot 2020 09 11 at 5 09 29 PM

4. Select Cancel All Failed Commands and click the Next button.

Screen Shot 2020 09 11 at 5 09 39 PM

5. Once all failed commands have been cleared, click the Done button.

Screen Shot 2020 09 11 at 5 09 45 PM

Clearing failed MDM commands using the Jamf Pro Classic API

You can also use the Jamf Pro Classic API to script an automatic clearing of failed MDM commands at whatever interval is desired. There’s numerous ways to make this work, with my approach being the following:

1. Write a script designed to run via a Jamf Pro policy on individual Macs to perform the following tasks:

a. Use the API and the Mac’s hardware UUID to identify the Mac’s computer ID in Jamf Pro.
b. Use the API and the Mac’s hardware UUID to download the list of failed MDM commands.
c. Use the API and the Mac’s Jamf Pro computer ID clear all failed MDM commands associated with that Jamf Pro computer ID.

Note: For those who haven’t used the Jamf Pro Classic API before, you will need to provide a username and password to the script. This is a security risk, so my recommendation is to carefully evaluate if the risk is worth it for your environment. If it’s not, don’t use this approach.

One way to mitigate this risk is to set up a dedicated account with the least privileges necessary to accomplish the task of clearing the failed MDM commands. This method does not eliminate the risk, but it may reduce it to one acceptable in your environment.

In my testing, the least privileges are the following:

In Jamf Pro Server Objects:

Computers: Read

Screen Shot 2020 09 25 at 9 57 12 AM

In Jamf Pro Server Actions:

Flush MDM Commands

Screen Shot 2020 09 25 at 9 56 59 AM

2. Set up a Jamf Pro computer policy with the following components:

Script: The script to clear failed MDM commands
Trigger: Recurring Check-In
Execution Frequency: Once every day

Note: Execution Frequency can be set as desired for a longer interval, like Once every week or Once every month.

The script is available from following address on GitHub:

https://github.com/rtrouton/rtrouton_scripts/tree/master/rtrouton_scripts/Casper_Scripts/clear_failed_Jamf_Pro_mdm_commands

Backing up Jamf Pro Self Service bookmarks

$
0
0

As part of working with Jamf Pro, I prefer to be able to save as much of the existing configuration of it as possible. Normally I can do this via the Jamf Pro Classic API and I have a number of blog posts showing how I use the API to create backups of my Jamf Pro configuration.

However, one set of data which is not accessible via the API are the Self Service bookmarks.

Screen Shot 2020 09 27 at 11 29 48 AM

If I want to back up this information, is there a way outside of the API? It turns out that there is. For more details, please see below the jump.

After some digging around, I discovered that the Self Service bookmarks are automatically downloaded from the Jamf Pro server and stored locally on each Mac in the following directory:

/Library/Application Support/JAMF/Self Service/Managed Plug-ins

In this directory, there are .plist files named with the Jamf Pro ID number of the relevant Self Service bookmark.

Screen Shot 2020 09 27 at 11 31 16 AM

To make backups of the Self Service bookmarks, I’ve written a script which performs the following tasks:

  1. If necessary, create a directory for storing backup copies of the Self Service bookmark files.
  2. Make copies of the Self Service bookmark files.
  3. Name the copied files using the title of the Self Service bookmark.
  4. Store the copied bookmarks in the specified directory.

Once the script is run, you should see copies of the Self Service bookmark files appearing in the script-specified location.

Screen Shot 2020 09 27 at 11 43 33 AM

This location can be set manually or created automatically by the script.

Screen Shot 2020 09 27 at 11 42 59 AM

The script is available below, and at the following address on GitHub:

https://github.com/rtrouton/rtrouton_scripts/tree/master/rtrouton_scripts/Casper_Scripts/Jamf_Pro_Self_Service_Bookmark_Backup

Jamf_Pro_Self_Service_Bookmark_Backup.sh:

#!/bin/bash
# This script is designed to do the following:
#
# 1. If necessary, create a directory for storing backup copies of Jamf Pro Self Service bookmark files.
# 2. Make copies of the Self Service bookmark files.
# 3. Name the copied files using the title of the Self Service bookmark.
# 4. Store the copied bookmarks in the specified directory.
#
# If you choose to specify a directory to save the Self Service bookmarks into,
# please enter the complete directory path into the SelfServiceBookmarkBackupDirectory
# variable below.
SelfServiceBookmarkBackupDirectory=""
# If the SelfServiceBookmarkBackupDirectory isn't specified above, a directory will be
# created and the complete directory path displayed by the script.
error=0
if [[ -z "$SelfServiceBookmarkBackupDirectory" ]]; then
SelfServiceBookmarkBackupDirectory=$(mktemp -d)
echo "A location to store copied bookmarks has not been specified."
echo "Copied bookmarks will be stored in $SelfServiceBookmarkBackupDirectory."
fi
self_service_bookmarks="/Library/Application Support/JAMF/Self Service/Managed Plug-ins"
for bookmark in "$self_service_bookmarks"/*.plist
do
echo "Processing "$bookmark" file…"
bookmark_name=$(/usr/bin/defaults read "$bookmark" title)
cat "$bookmark" > "$SelfServiceBookmarkBackupDirectory/${bookmark_name}.plist"
if [[ $? -eq 0 ]]; then
echo "$bookmark_name.plist processed and stored in $SelfServiceBookmarkBackupDirectory."
else
echo "ERROR! Problem occurred when processing $self_service_bookmarks/$bookmark file!"
error=1
fi
done
exit $error
view raw gistfile1.txt hosted with ❤ by GitHub

“Getting Started with Amazon Web Services” encore presentation at MacSysAdmin 2020

$
0
0

The MacSysAdmin conference, like many conferences in 2020, has moved to an online format for this year. The MacSysAdmin 2020 organizers have also decided to have both sessions that are new for the 2020 conference as well as give an encore performance for sessions given at past MacSysAdmin conferences.

I was pleased to see that my “Getting Started with Amazon Web Services” session from MacSysAdmin 2018 made the cut for MacSysAdmin 2020. For those interested, my session will be available for viewing this Friday, October 9th.


Remotely gathering sysdiagnose files and uploading them to S3

$
0
0

One of the challenges for helpdesks with folks now working remotely instead of in offices has been that it’s now harder to gather logs from user’s Macs. A particular challenge for those folks working with AppleCare Enterprise Support has been with regards to requests for sysdiagnose logfiles.

The sysdiagnose tool is used for gathering a large amount of diagnostic files and logging, but the resulting output file is often a few hundred megabytes in size. This is usually too large to email, so alternate arrangements have to be made to get it off of the Mac in question and upload it to a location where the person needing the logs can retrieve them.

After needing to gather sysdiagnose files a few times, I’ve developed a scripted solution which does the following:

  • Collects a sysdiagnose file.
  • Creates a read-only compressed disk image containing the sysdiagnose file.
  • Uploads the compressed disk image to a specified S3 bucket in Amazon Web Services.
  • Cleans up the directories and files created by the script.

For more details, please see below the jump.

Pre-requisites

You will need to provide the following information to successfully upload the sysdiagnose file to an S3 bucket:

  • S3 bucket name
  • AWS region for the S3 bucket
  • AWS programmatic user’s access key and secret access key
  • The S3 ACL used on the bucket

The AWS programmatic user must have at minimum the following access rights to the specified S3 bucket:

  • s3:ListBucket
  • s3:PutObject
  • s3:PutObjectAcl

The AWS programmatic user must have at minimum the following access rights to all S3 buckets in the account:

  • s3:ListAllMyBuckets

These access rights will allow the AWS programmatic user the ability to do the following:

  1. Identify the correct S3 bucket
  2. Write the uploaded file to the S3 bucket

Note: The AWS programmatic user would not have the ability to read the contents of the S3 bucket.

Information on S3 ACLs can be found via the link below:
https://docs.aws.amazon.com/AmazonS3/latest/dev/acl-overview.htmlcanned-acl

In an S3 bucket’s default configuration, where all public access is blocked, the ACL should be the one listed below:

private

Using the script

Once you have the S3 bucket and AWS programmatic user set up, you will need to configure the user-editable variables in the script:

# User-editable variables
s3AccessKey="add_AWS_access_key_here"
s3SecretKey="add_AWS_secret_key_here"
s3acl="add_AWS_S3_ACL_here"
s3Bucket="add_AWS_S3_bucket_name_here"
s3Region="add_AWS_S3_region_here"
view raw
gistfile1.txt
hosted with ❤ by GitHub

For example, if you set up the following S3 bucket and user access:

What: S3 bucket named sysdiagnose-log-s3-bucket
Where: AWS’s US-East-1 region
ACL configuration: Default ACL configuration with all public access blocked
AWS access key: AKIAX0FXU19HY2NLC3NF
AWS secret access key: YWRkX0FXU19zZWNyZXRfa2V5X2hlcmUK

The user-editable variables should look like this:

# User-editable variables
s3AccessKey="AKIAX0FXU19HY2NLC3NF"
s3SecretKey="YWRkX0FXU19zZWNyZXRfa2V5X2hlcmUK"
s3acl="private"
s3Bucket="sysdiagnose-log-s3-bucket"
s3Region="us-east-1"
view raw
gistfile1.txt
hosted with ❤ by GitHub

Note: The S3 bucket, access key and secret access key information shown above is no longer valid.

The script can be run manually or by a systems management tool. I’ve tested it with Jamf Pro and it appears to work without issue.

When run manually in Terminal, you should see the following output.

username@computername ~ % sudo /Users/username/Desktop/remote_sysdiagnose_collection.sh
Password:
Progress:
[|||||||||||||||||||||||||||||||||||||||100%|||||||||||||||||||||||||||||||||||]
Output available at '/var/folders/zz/zyxvpxvq6csfxvn_n0000000000000/T/logresults-20201016144407.1wghyNXE/sysdiagnose-VMDuaUp36s8k-564DA5F0-0D34-627B-DE5E-A7FA6F7AF30B-20201016144407.tar.gz'.
………………………………………………………..
created: /var/folders/zz/zyxvpxvq6csfxvn_n0000000000000/T/sysdiagnoselog-20201016144407.VQgd61kP/VMDuaUp36s8k-564DA5F0-0D34-627B-DE5E-A7FA6F7AF30B-20201016144407.dmg
Uploading: /var/folders/zz/zyxvpxvq6csfxvn_n0000000000000/T/sysdiagnoselog-20201016144407.VQgd61kP/VMDuaUp36s8k-564DA5F0-0D34-627B-DE5E-A7FA6F7AF30B-20201016144407.dmg (application/octet-stream) to sysdiagnose-log-s3-bucket:VMDuaUp36s8k-564DA5F0-0D34-627B-DE5E-A7FA6F7AF30B-20201016144407.dmg
######################################################################### 100.0%
VMDuaUp36s8k-564DA5F0-0D34-627B-DE5E-A7FA6F7AF30B-20201016144407.dmg uploaded successfully to sysdiagnose-log-s3-bucket.
username@computername ~ %
view raw
gistfile1.txt
hosted with ❤ by GitHub

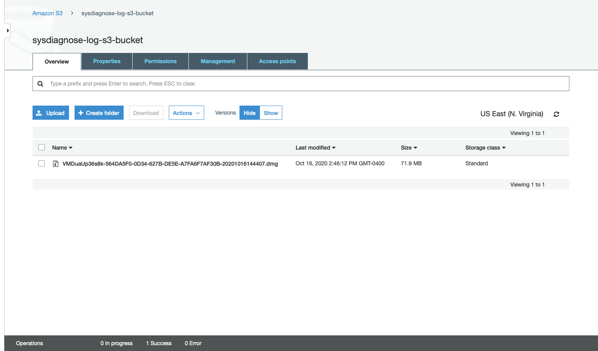
Once the script runs, you should see a disk image file appear in the S3 bucket with a name automatically generated using the following information:

Mac’s serial number – Mac’s hardware UUID – Year-Month-Day-Hour-Minute-Second

Screen Shot 2020 10 16 at 2 51 08 PM

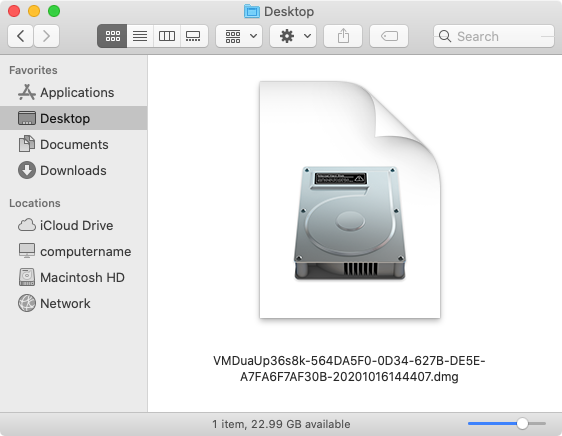
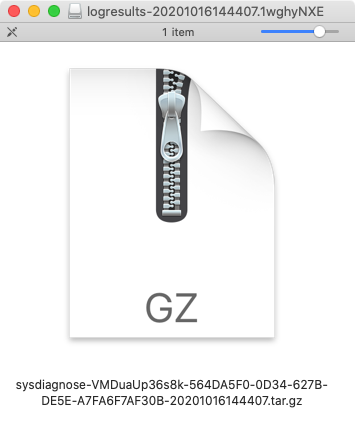
Once downloaded, the sysdiagnose file is accessible by mounting the disk image.

Screen Shot 2020 10 16 at 2 53 58 PM

Screen Shot 2020 10 16 at 2 52 27 PM

The script is available below, and at the following address on GitHub:

https://github.com/rtrouton/rtrouton_scripts/tree/master/rtrouton_scripts/remote_sysdiagnose_collection

#!/bin/bash
# Log collection script which performs the following tasks:
#
# * Collects a sysdiagnose file.
# * Creates a read-only compressed disk image containing the sysdiagnose file.
# * Uploads the compressed disk image to a specified S3 bucket.
# * Cleans up the directories and files created by the script.
#
# You will need to provide the following information to successfully upload
# to an S3 bucket:
#
# S3 bucket name
# AWS region for the S3 bucket
# AWS programmatic user's access key and secret access key
# The S3 ACL used on the bucket
#
# The AWS programmatic user must have at minimum the following access rights to the specified S3 bucket:
#
# s3:ListBucket
# s3:PutObject
# s3:PutObjectAcl
#
# The AWS programmatic user must have at minimum the following access rights to all S3 buckets in the account:
#
# s3:ListAllMyBuckets
#
# These access rights will allow the AWS programmatic user the ability to do the following:
#
# A. Identify the correct S3 bucket
# B. Write the uploaded file to the S3 bucket
#
# Note: The AWS programmatic user would not have the ability to read the contents of the S3 bucket.
#
# Information on S3 ACLs can be found via the link below:
# https://docs.aws.amazon.com/AmazonS3/latest/dev/acl-overview.html#canned-acl
#
# By default, the ACL should be the one listed below:
#
# private
#
# User-editable variables
s3AccessKey="add_AWS_access_key_here"
s3SecretKey="add_AWS_secret_key_here"
s3acl="add_AWS_S3_ACL_here"
s3Bucket="add_AWS_S3_bucket_name_here"
s3Region="add_AWS_S3_region_here"
# It should not be necessary to edit any of the variables below this line.
error=0
date=$(date +%Y%m%d%H%M%S)
serial_number=$(ioreg -c IOPlatformExpertDevice -d 2 | awk -F\" '/IOPlatformSerialNumber/{print $(NF-1)}')
hardware_uuid=$(ioreg -ad2 -c IOPlatformExpertDevice | xmllint –xpath '//key[.="IOPlatformUUID"]/following-sibling::*[1]/text()')
results_directory=$(mktemp -d -t logresults-${date})
sysdiagnose_name="sysdiagnose-${serial_number}${hardware_uuid}${date}.tar.gz"
dmg_name="${serial_number}${hardware_uuid}${date}.dmg"
dmg_file_location=$(mktemp -d -t sysdiagnoselog-${date})
fileName=$(echo "$dmg_file_location"/"$dmg_name")
contentType="application/octet-stream"
LogGeneration()
{
/usr/bin/sysdiagnose -f ${results_directory} -A "$sysdiagnose_name" -u -b
if [[ -f "$results_directory/$sysdiagnose_name" ]]; then
/usr/bin/hdiutil create -format UDZO -srcfolder ${results_directory} ${dmg_file_location}/${dmg_name}
else
echo "ERROR! Log file not created!"
error=1
fi
}
S3Upload()
{
# S3Upload function taken from the following site:
# https://very.busted.systems/shell-script-for-S3-upload-via-curl-using-AWS-version-4-signatures
usage()
{
cat <<USAGE
Simple script uploading a file to S3. Supports AWS signature version 4, custom
region, permissions and mime-types. Uses Content-MD5 header to guarantee
uncorrupted file transfer.
Usage:
`basename $0` aws_ak aws_sk bucket srcfile targfile [acl] [mime_type]
Where <arg> is one of:
aws_ak access key ('' for upload to public writable bucket)
aws_sk secret key ('' for upload to public writable bucket)
bucket bucket name (with optional @region suffix, default is us-east-1)
srcfile path to source file
targfile path to target (dir if it ends with '/', relative to bucket root)
acl s3 access permissions (default: public-read)
mime_type optional mime-type (tries to guess if omitted)
Dependencies:
To run, this shell script depends on command-line curl and openssl, as well
as standard Unix tools
Examples:
To upload file '~/blog/media/image.png' to bucket 'storage' in region
'eu-central-1' with key (path relative to bucket) 'media/image.png':
`basename $0` ACCESS SECRET storage@eu-central-1 \\
~/blog/image.png media/
To upload file '~/blog/media/image.png' to public-writable bucket 'storage'
in default region 'us-east-1' with key (path relative to bucket) 'x/y.png':
`basename $0` '' '' storage ~/blog/image.png x/y.png
USAGE
exit 0
}
guessmime()
{
mime=`file -b –mime-type $1`
if [ "$mime" = "text/plain" ]; then
case $1 in
*.css) mime=text/css;;
*.ttf|*.otf) mime=application/font-sfnt;;
*.woff) mime=application/font-woff;;
*.woff2) mime=font/woff2;;
*rss*.xml|*.rss) mime=application/rss+xml;;
*) if head $1 | grep '<html.*>' >/dev/null; then mime=text/html; fi;;
esac
fi
printf "$mime"
}
if [ $# -lt 5 ]; then usage; fi
# Inputs.
aws_ak="$1" # access key
aws_sk="$2" # secret key
bucket=`printf $3 | awk 'BEGIN{FS="@"}{print $1}'` # bucket name
region=`printf $3 | awk 'BEGIN{FS="@"}{print ($2==""?"us-east-1":$2)}'` # region name
srcfile="$4" # source file
targfile=`echo -n "$5" | sed "s/\/$/\/$(basename $srcfile)/"` # target file
acl=${6:-'public-read'} # s3 perms
mime=${7:-"`guessmime "$srcfile"`"} # mime type
md5=`openssl md5 -binary "$srcfile" | openssl base64`
# Create signature if not public upload.
key_and_sig_args=''
if [ "$aws_ak" != "" ] && [ "$aws_sk" != "" ]; then
# Need current and file upload expiration date. Handle GNU and BSD date command style to get tomorrow's date.
date=`date -u +%Y%m%dT%H%M%SZ`
expdate=`if ! date -v+1d +%Y-%m-%d 2>/dev/null; then date -d tomorrow +%Y-%m-%d; fi`
expdate_s=`printf $expdate | sed s/-//g` # without dashes, as we need both formats below
service='s3'
# Generate policy and sign with secret key following AWS Signature version 4, below
p=$(cat <<POLICY | openssl base64
{ "expiration": "${expdate}T12:00:00.000Z",
"conditions": [
{"acl": "$acl" },
{"bucket": "$bucket" },
["starts-with", "\$key", ""],
["starts-with", "\$content-type", ""],
["content-length-range", 1, `ls -l -H "$srcfile" | awk '{print $5}' | head -1`],
{"content-md5": "$md5" },
{"x-amz-date": "$date" },
{"x-amz-credential": "$aws_ak/$expdate_s/$region/$service/aws4_request" },
{"x-amz-algorithm": "AWS4-HMAC-SHA256" }
]
}
POLICY
)
# AWS4-HMAC-SHA256 signature
s=`printf "$expdate_s" | openssl sha256 -hmac "AWS4$aws_sk" -hex | sed 's/(stdin)= //'`
s=`printf "$region" | openssl sha256 -mac HMAC -macopt hexkey:"$s" -hex | sed 's/(stdin)= //'`
s=`printf "$service" | openssl sha256 -mac HMAC -macopt hexkey:"$s" -hex | sed 's/(stdin)= //'`
s=`printf "aws4_request" | openssl sha256 -mac HMAC -macopt hexkey:"$s" -hex | sed 's/(stdin)= //'`
s=`printf "$p" | openssl sha256 -mac HMAC -macopt hexkey:"$s" -hex | sed 's/(stdin)= //'`
key_and_sig_args="-F X-Amz-Credential=$aws_ak/$expdate_s/$region/$service/aws4_request -F X-Amz-Algorithm=AWS4-HMAC-SHA256 -F X-Amz-Signature=$s -F X-Amz-Date=${date}"
fi
# Upload. Supports anonymous upload if bucket is public-writable, and keys are set to ''.
echo "Uploading: $srcfile ($mime) to $bucket:$targfile"
curl \
-# -k \
-F key=$targfile \
-F acl=$acl \
$key_and_sig_args \
-F "Policy=$p" \
-F "Content-MD5=$md5" \
-F "Content-Type=$mime" \
-F "file=@$srcfile" \
https://${bucket}.s3.amazonaws.com/ | cat # pipe through cat so curl displays upload progress bar, *and* response
}
CleanUp()
{
if [[ -d ${results_directory} ]]; then
/bin/rm -rf ${results_directory}
fi
if [[ -d ${dmg_file_location} ]]; then
/bin/rm -rf ${dmg_file_location}
fi
}
LogGeneration
if [[ -f ${fileName} ]]; then
S3Upload "$s3AccessKey" "$s3SecretKey" "$s3Bucket"@"$s3Region" ${fileName} "$dmg_name" "$s3acl" "$contentType"
if [[ $? -eq 0 ]]; then
echo "$dmg_name uploaded successfully to $s3Bucket."
else
echo "ERROR! Upload of $dmg_name failed!"
error=1
fi
else
echo "ERROR! Creating $dmg_name failed! No upload attempted."
error=1
fi
CleanUp
exit $error

Extension attributes for Jamf Protect

$
0
0

I’ve started working with Jamf Protect and, as part of that, I found that I needed to be able to report the following information about Jamf Protect to Jamf Pro:

  1. Is the Jamf Protect agent installed on a particular Mac?
  2. Is the Jamf Protect agent running on a particular Mac?
  3. Which Jamf Protect server is a particular Mac handled by?

To address these needs, I’ve written three Jamf Pro extension attributes which display the requested information as part of a Mac’s inventory record in Jamf Pro. For more details, please see below the jump:

The three Extension Attributes do the following:

jamf_protect_installed.sh: Checks to see if Jamf Protect is installed and the agent is able to run.

https://github.com/rtrouton/rtrouton_scripts/tree/master/rtrouton_scripts/Casper_Extension_Attributes/jamf_protect_installed

Jamf Pro Extension Attribute Setup1

jamf_protect_status.sh: Checks and validates the following:

  • Jamf Protect is installed
  • The Jamf Protect processes are running

https://github.com/rtrouton/rtrouton_scripts/tree/master/rtrouton_scripts/Casper_Extension_Attributes/jamf_protect_status

Jamf Pro Extension Attribute Setup3

jamf_protect_server.sh: Checks to see if Jamf Protect’s protectctl tool is installed on a particular Mac. If the protectctl tool is installed, check for and display the Jamf Protect tenant name.

https://github.com/rtrouton/rtrouton_scripts/tree/master/rtrouton_scripts/Casper_Extension_Attributes/jamf_protect_server

Jamf Pro Extension Attribute Setup2

Detecting kernel panics using Jamf Pro

$
0
0

Something that has (mostly) become more rare on the Mac platform are kernel panics, which are computer errors from which the operating system cannot safely recover without risking major data loss. Since a kernel panic means that the system has to halt or automatically reboot, this is a major inconvenience to the user of the computer.

6lYdt

Kernel panics are always the result of a software bug, either in Apple’s code or in the code of a third party’s kernel extension. Since they are always from bugs and they cause work interruptions, it’s a good idea to get on top of kernel panic issues as quickly as possible. To assist with this, a Jamf Pro Extension Attribute has been written to detect if a kernel panic has taken place. For more details, please see below the jump.

When a Mac has a kernel panic, the information from the panic is logged to a log file in /Library/Logs/DiagnosticReports. This log file will be named something similar to this:

Kernel-date-goes-here.panic

The Extension Attribute is based off an earlier example posted by Mike Morales on the Jamf Nation forums. It performs the following tasks:

  1. Checks to see if there are any logs in the /Library/Logs/DiagnosticReports with a .panic file extension.
  2. If there are, check to see which are from the past seven days.
  3. Output a count of how many .panic logs were generated in the past seven days.

To test the Extension Attribute, it is possible to force a kernel panic on a Mac. To do this, please use the process shown below:

1. Disable System Integrity Protection
2. Run the following command with root privileges:

dtrace -w -n "BEGIN{ panic();}"

Screen Shot 2020 11 10 at 10 52 23 AM

3. After the kernel panic, run a Jamf Pro inventory update.

After the inventory update, it should show that at least one kernel panic had occurred on that Mac. For more information about kernel panics, please see the link below:

https://developer.apple.com/library/content/technotes/tn2004/tn2118.html

The Extension Attribute is available below and at the following address on GitHub:

https://github.com/rtrouton/rtrouton_scripts/tree/master/rtrouton_scripts/Casper_Extension_Attributes/kernel_panic_detection

#!/bin/bash
# Detects kernel panics which occurred in the last seven days.
#
# Original idea and script from here:
# https://www.jamf.com/jamf-nation/discussions/23976/kernal-panic-reporting#responseChild145035
#
# This Jamf Pro Extension Attribute is designed to
# check the contents of /Library/Logs/DiagnosticReports
# and report on how many log files with the file suffix
# of ".panic" were created in the previous seven days.
PanicLogCount=$(/usr/bin/find /Library/Logs/DiagnosticReports -Btime -7 -name *.panic | grep . -c)
echo "<result>$PanicLogCount</result>"
exit 0
view raw
gistfile1.txt
hosted with ❤ by GitHub

Preventing the macOS Big Sur upgrade advertisement from appearing in the Software Update preference pane on macOS Catalina

$
0
0

Not yet ready for macOS Big Sur in your environment, but you’ve trained your folks to look at the Software Update preference pane to see if there’s available updates? One of the ways Apple is advertising the macOS Big Sur upgrade is via the Software Update preference pane:

Screen Shot 2020 11 12 at 2 25 15 PM

You can block it from appearing using the softwareupdate –ignore command, but for macOS Catalina, Mojave and High Sierra, that command now requires one of the following enrollments as a pre-requisite:

  • Apple Business Manager enrollment
  • Apple School Manager enrollment
  • Enrollment in a user-approved MDM

For more information on this, please reference the following KBase article: https://support.apple.com/HT210642 (search for the following: Major new releases of macOS can be hidden when using the softwareupdate(8) command).

For more details, please see below the jump.

Once that pre-requisite condition has been satisfied, run the following command with root privileges:

softwareupdate --ignore "macOS Big Sur"

You should see text appear which looks like this:

Ignored updates:
(
"macOS Big Sur"
)

Screen Shot 2020 11 12 at 2 28 44 PM

The advertisement banner should now be removed from the Software Update preference pane.

Screen Shot 2020 11 12 at 2 28 58 PM

Note: If the pre-requisite condition has not been fulfilled, running the softwareupdate –ignore command will have no effect.

Screen Shot 2020 11 12 at 2 28 03 PM

Installing Rosetta 2 on Apple Silicon Macs

$
0
0

With Apple now officially selling Apple Silicon Macs, there’s a design decision which Apple made with macOS Big Sur that may affect various Mac environments:

At this time, macOS Big Sur does not install Rosetta 2 by default on Apple Silicon Macs.

Rosetta 2 is Apple’s software solution for aiding in the transition from Macs running on Intel processors to Macs running on Apple Silicon processors. It allows most Intel apps to run on Apple Silicon without issues, which provides time for vendors to update their software to a Universal build which can run on both Intel and Apple Silicon.

Without Rosetta 2 installed, Intel apps do not run on Apple Silicon. So for those folks who need Rosetta 2, how to install it? For more details, please see below the jump.

You can install Rosetta 2 on Apple Silicon Macs using the softwareupdate command. To install Rosetta 2, run the following command with root privileges:

/usr/sbin/softwareupdate --install-rosetta

Installing this way will cause an interactive prompt to appear, asking you to agree to the Rosetta 2 license. If you want to perform a non-interactive install, please run the following command with root privileges to install Rosetta 2 and agree to the license in advance:

/usr/sbin/softwareupdate --install-rosetta --agree-to-license

Having the the non-interactive method for installing Rosetta 2 available makes it easier to script the installation process. My colleague Graham Gilbert has written a script for handling this process and discussed it here:

https://grahamgilbert.com/blog/2020/11/13/installing-rosetta-2-on-apple-silicon-macs/

I’ve written a similar script to Graham’s, which is available below and from the following address on GitHub:

https://github.com/rtrouton/rtrouton_scripts/tree/master/rtrouton_scripts/install_rosetta_on_apple_silicon

#!/bin/bash
# Installs Rosetta as needed on Apple Silicon Macs.
exitcode=0
# Determine OS version
# Save current IFS state
OLDIFS=$IFS
IFS='.' read osvers_major osvers_minor osvers_dot_version <<< "$(/usr/bin/sw_vers -productVersion)"
# restore IFS to previous state
IFS=$OLDIFS
# Check to see if the Mac is reporting itself as running macOS 11
if [[ ${osvers_major} -ge 11 ]]; then
# Check to see if the Mac needs Rosetta installed by testing the processor
processor=$(/usr/sbin/sysctl -n machdep.cpu.brand_string | grep -o "Intel")
if [[ -n "$processor" ]]; then
echo "$processor processor installed. No need to install Rosetta."
else
# Check Rosetta LaunchDaemon. If no LaunchDaemon is found,
# perform a non-interactive install of Rosetta.
if [[ ! -f "/Library/Apple/System/Library/LaunchDaemons/com.apple.oahd.plist" ]]; then
/usr/sbin/softwareupdate –install-rosetta –agree-to-license
if [[ $? -eq 0 ]]; then
echo "Rosetta has been successfully installed."
else
echo "Rosetta installation failed!"
exitcode=1
fi
else
echo "Rosetta is already installed. Nothing to do."
fi
fi
else
echo "Mac is running macOS $osvers_major.$osvers_minor.$osvers_dot_version."
echo "No need to install Rosetta on this version of macOS."
fi
exit $exitcode
Viewing all 764 articles
Browse latest View live