Quantcast
Channel: rtrouton – Der Flounder
Viewing all 764 articles
Browse latest View live

Apple Device Management book now available for purchase from Apple Books

$
0
0

For the folks who have asked about eBook purchasing options for the Apple Device Management book I wrote with my colleague Charles Edge, I’m happy to say that you can now also get our book from Apple Books.

IMG 0941

That means that you can now get it in digital format from the following vendors:

If you’re looking for a digital copy, there are lots of options available. Hopefully, you’ll find one that works best for you.


A beginner’s guide to the Jamf Pro Classic API

$
0
0

When working with Jamf Pro, one way to save yourself a lot of clicking in the admin console is to use one of the two current Jamf Pro APIs. Both APIs are REST APIs, which means they can perform requests and receive responses via HTTP protocols like GET, PUT, POST and DELETE. That means that the curl tool can be used to send commands to and receive information from a Jamf Pro server.

The two APIs are as follows:

  • Classic API
  • Jamf Pro API (formerly known as the Universal API)

Classic API

This API is the original one which Jamf Pro started with and it is slated for eventual retirement. This API is designed to work with XML and JSON for both input and output.

The base URL for the Classic API is located at /JSSResource on your Jamf Pro server. If your Jamf Pro server is https://server.name.here:8443, that means that the API base URL is as follows:

https://server.name.here:8443/JSSResource

To help you become familiar with the API, Jamf includes documentation and “Try it out” functionality at the following URL on your Jamf Pro server:

https://server.name.here:8443/api

The Classic API is designed to work with usernames and passwords for authentication, with the username and password being passed as part of the curl command.

Examples: https://developer.jamf.com/apis/classic-api/index

Jamf Pro API

This API is in beta and is designed to be an eventual replacement for the Classic API. This API is designed to work with JSON for both input and output.

The base URL for the Jamf Pro API is located at /JSSResource on your Jamf Pro server. If your Jamf Pro server is https://server.name.here:8443, that means that the API base URL is as follows:

https://server.name.here:8443/uapi

To help you become familiar with the API, Jamf includes documentation and “Try it out” functionality at the following URL on your Jamf Pro server:

https://server.name.here:8443/uapi/docs

The Jamf Pro API is designed to work with token-based authentication, with a Jamf Pro username and password used to initially generate the necessary token. These tokens are time-limited and expire after 30 minutes. However, you can generate a new token for API authentication using the existing token’s credentials. The new token generation process does the following:

  1. Creates a new token with the same access rights as the existing token.
  2. Invalidates the existing token.

Jamf Pro API examples: https://developer.jamf.com/apis/jamf-pro-api/index

For more details, please see below the jump.

Of the two, the Classic API is the one currently most used by Jamf Pro admins and the one I’ll be focusing on how to use it, using XML for input and output. The reasons that the Classic API is most used at this time are the following:

  • The Classic API has been around the longest, so more Jamf Pro admins are familiar with it.
  • Both XML and JSON input and output are supported:
    • There are various tools installed as part of macOS which allow XML parsing and manipulation when using Bash shell scripting.
    • There are not tools installed as part of macOS which allow JSON parsing and manipulation when using Bash shell scripting.

There are tools available for macOS which allow easy JSON parsing and manipulation, with jq being an excellent example. However, they are not installed as part of macOS Catalina or earlier which means that its up to the Mac admin to make sure the relevant JSON parsing tools are installed and up to date on the Mac admin’s managed Macs.

In contrast, a number of XML parsing tools (like xmllint and xpath) are installed as part of macOS Catalina and earlier, which means that the Mac admin can currently rely on them being available if the Mac admin needs to run API-using scripts on managed Macs.

When using the Classic API, there are four commands available:

  • DELETE
  • GET
  • PUT
  • POST

DELETE = Deletes data from Jamf Pro
GET = Retrieves data from Jamf Pro
PUT = Updates data on Jamf Pro
POST = Creates new data on Jamf Pro

When sending one of these commands to Jamf Pro, you must include the following:

  1. Tool being used – In this case, we’re using curl
  2. Authentication – In this case, we’re using the username and password of a Jamf Pro user with the correct privileges to run the API command.
  3. URL – We’re using the API base URL followed by the specific API endpoint and data identifier
  4. -X or –request – We’re using the curl option for sending a request because we’re sending in a request for Jamf Pro to do something.
  5. Command being sent – This will be DELETE, GET, PUT or POST.

For all commands except DELETE, we also need to specify a header as this will specify for Jamf Pro if we’re using XML or JSON. Without this header specification, you should get XML but Jamf Pro may send back JSON instead. By specifying XML or JSON using the header, we avoid this issue.

The reason why DELETE is an exception is that we’re not sending or receiving any XML or JSON data. Instead, the Jamf Pro server receives and executes the command to delete the specified data.

Headers:

GET

The header should look like this for XML output:

-H "accept: application/xml"

The header should look like this for JSON output:

-H "accept: application/json"

PUT

The header should look like this for XML output:

-H "content-type: application/xml"

The header should look like this for JSON output:

-H "content-type: application/json"

POST

The header should look like this for XML output:

-H "content-type: application/xml"

The header should look like this for JSON output:

-H "content-type: application/json"

If you look closely, GET is using different headers than PUT and POST are:

GET

-H "accept: application/xml"

PUT / POST

-H "content-type: application/xml"

Why? It has to do with which way that data is expected to flow. With GET, you’re downloading data from the server and with PUT / POST, you’re uploading to the server. So with a GET command, setting accept: as part of the header lets the Jamf Pro server know how you’re planning to receive the data. For PUT / POST, setting content-type: as part of the header lets the Jamf Pro server know what to expect what kind of content it should be expecting for the data being uploaded to it.

Using GET

Let’s take a look at some GET examples, using Jamf’s tryitout.jamfcloud.com server. This server doesn’t require authentication, but I’m going to add the curl options for sending username and password as part of the command so that the command matches what a normal Jamf Pro server should be sent.

curl -su username:password "https://tryitout.jamfcloud.com/JSSResource/accounts" -H "accept: application/xml" -X GET

When I run that, I get the following XML output:

That could use some improvement for readability, so next let’s pipe it through xmllint’s formatting option to make it look nicer.

curl -su username:password "https://tryitout.jamfcloud.com/JSSResource/accounts" -H "accept: application/xml" -X GET | xmllint --format -

Note: When using xmllint’s formatting option, you need to specify the file being formatted: xmllint –format /path/to/filename.xml. In order to have it format standard input, like we’re trying to do in this example by piping the output to xmllint, the filename used is a single dash ( ).

When I run that, I get the following output:

That output lists all accounts and gives me two pieces of information about each account:

  • ID
  • Name

Normally, the API only gives me the option about pulling additional data about something specific by using its ID number. However, for accounts, I’m also given the option of doing a lookup by account name.

From there, I can pull out information about the following account using either the username or ID:

Username: jnuc
ID: 3

By ID: https://tryitout.jamfcloud.com/JSSResource/accounts/userid/3

curl -su username:password "https://tryitout.jamfcloud.com/JSSResource/accounts/userid/3" -H "accept: application/xml" -X GET | xmllint --format -

By Name: https://tryitout.jamfcloud.com/JSSResource/accounts/username/jnuc

curl -su username:password "https://tryitout.jamfcloud.com/JSSResource/accounts/username/jnuc" -H "accept: application/xml" -X GET | xmllint --format -

Since both API requests are ultimately referring to the same data, you should get identical output:

Using POST

When you want to upload all-new data to the Jamf Pro server via the API, you would use the POST command. This command requires that the data be sent along with the API command, so you would need to have either the XML written out as part of the API command or in a file. One important thing to know when using POST is that the ID used is always going to be the number 0. Jamf Pro will interpret an ID of zero as meaning that Jamf Pro should assign the next available ID number to the uploaded data.

For example, if you want to create a new department named Art on your Jamf Pro server, you could use a command like the one shown below:

In this example, the XML being used is pretty simple so we’re flattening out the necessary XML into one line and including it in the command. We’re also using curl’s -d option, which tells curl that it will be transmitting data along with the rest of the command.

If the data being sent along is a little unwieldy to include with the command, curl has a -T option for uploading a file. For example, if you wanted to create a smart group, you could write out the necessary XML into a file like the one shown below:

Once you have the file ready, you could use a command like the one shown below to create the smart group:

curl -su username:password "https://server.name.here/JSSResource/computergroups/id/0" -H "content-type: application/xml" -X POST -T /path/to/filename.xml

Using PUT

When you want to update existing data to the Jamf Pro server via the API, you would use the PUT command. When using this, you would be targeting some existing data and changing one of the data’s existing attributes. A good example would be if you want to change the status of a policy from enabled to disabled. To do this with a policy which has an ID number of 27, you could use a command like the one shown below:

Similar to the earlier POST example which uses a XML file, you can also used the -T option with PUT to upload a file. For example, if you wanted to update the distribution point associated with a network segment which has an ID number of 561, you could add the necessary data into an XML file like the one shown below:

Once you have the file ready, you could use a command like the one shown below to update the network segment:

curl -su username:password "https://server.name.here/JSSResource/networksegments/id/561" -H "content-type: application/xml" -X PUT -T /path/to/filename.xml

Using DELETE

When you want to delete data from the Jamf Pro server via the API, you would use the DELETE command. All you generally need with the DELETE command is the identifier for the data you want to remove, so the commands are simpler. No header info or specifying if you want to use XML or JSON is required.

For example, if you wanted to delete an existing computer inventory record which has the ID number of 1024, you can use a command like the one shown below to do so:

curl -su username:password "https://server.name.here/JSSResource/computers/id/1024" -X DELETE

Similarly, if you wanted to delete an existing network segment which has the ID number of 22, you could use a command like the one shown below:

curl -su username:password "https://server.name.here/JSSResource/networksegments/id/22" -X DELETE

Moving on to more advanced usage

You can use the Jamf Pro Classic API with scripting and other automation tools to accomplish some truly amazing administrative feats with Jamf Pro and the Jamf Pro API beta looks to build on that strong foundation. While the information in this post won’t solve all of your API-related issues, it does hopefully provide enough foundational support to get you started with using the Jamf Pro Classic API. Good luck!

Creating root-level directories and symbolic links on macOS Catalina

$
0
0

One of the changes which came with macOS Catalina was the introduction of a read-only root volume for the OS. For users or environments which were used to using adding directories to the root level of the boot drive, this change meant they could no longer do that.

To address this need, Apple added a new method for creating directories at the root level which leverages Apple File System’s new firmlink functionality. Firmlinks are new in macOS Catalina and are similar in function to Unix symbolic links, but instead of being only allowing travel one way (from source to destination) firmlinks allow bi-directional travel.

The use of firmlinks is exclusively reserved for the OS’s own use, but Apple has also made available what are called synthetic firmlinks. These synthetic firmlinks are how the OS enables folks to create directories and symbolic links on the read-only boot volume. For more details, please see below the jump.

To create a synthetic firmlink, you need to do the following:

1. Create a file in the /etc directory named synthetic.conf.
2. Make sure /etc/synthetic.conf has the following permissions:

  • root: read, write
  • wheel: read
  • everyone: read

3. In /etc/synthetic.conf, define the name(s) of the empty directory or symbolic link you want to have appear at the root level.

4. After all desired entries have been made, save the /etc/synthetic.conf file.

5. Restart the Mac to apply the changes.

For example, /etc/synthetic.conf may look like this:

Note: In those cases where you’re creating a symbolic link and are including a path, the start point for the directory path is not /. Instead, it is the next directory level down.

To show how this works, I’ve created a directory containing installer packages located at /Users/Shared/installers.

Screen Shot 2020 01 17 at 10 46 06 PM

To create a symbolic link at the root level named installers which points to /Users/Shared/installers, I would do the following:

1. Create the /etc/synthetic.conf file if it didn’t already exist.
2. Add the following entry to the /etc/synthetic.conf file:

installers	Users/Shared/installers

Screen Shot 2020 01 17 at 10 32 45 PM

3. Reboot the Mac.

Note: Whomever designed this came down on the “tabs” side of the “tabs vs. spaces” debate. When creating the separation between installers and Users/Shared/installers in the /etc/synthetic.conf file, you need to use tabs. If you use spaces instead, the synthetic firmlink won’t be created.

After the reboot, you should see a symbolic link named installers at the root level of the boot volume. When you navigate to it, you should see the contents of /Users/Shared/installers.

Screen Shot 2020 01 17 at 10 33 30 PM

To remove the symbolic link, remove the relevant entry from /etc/synthetic.conf and then restart. After the reboot, the installers symbolic link should be missing from the root level of the boot volume.

Screen Shot 2020 01 17 at 10 46 15 PM

For more information, please see the synthetic.conf man page. This is available by entering the following command in Terminal on macOS Catalina:

man synthetic.conf

Backing up a Jamf Pro database hosted in Amazon Web Services’ RDS service to an S3 bucket

$
0
0

For those using Amazon Web Services to host Jamf Pro, one of the issues you may run into is how to get backups of your Jamf Pro database which you can access. AWS’s RDS service makes backups of your database to S3, but you don’t get direct access to the S3 bucket where they’re stored.

In the event that you want a backup that you can access of your RDS-hosted MySQL database, Amazon provides the option for exporting a database snapshot to an S3 bucket in your AWS account. This process will export your data in Apache Parquet format instead of a MySQL database export file.

However, it’s also possible to create and use an EC2 instance to perform the following tasks:

  1. Connect to your RDS-hosted MySQL database.
  2. Create a backup of your MySQL database using the mysqldump tool.
  3. Store the backup in an S3 bucket of your choosing.

For more details, please see below the jump.

Setting up the backup server

In order to run the backups, you’ll need to set up several resources in AWS. This includes the following:

Please use the procedure below to create the necessary resources:

1. Create an S3 bucket to store your MySQL backups in.

2. Set up an IAM role which allows an EC2 instance to have read/write access to the S3 bucket where you’ll be storing the backups.

3. Create an EC2 instance running Linux.

Note: This instance will need to have enough free space to store a complete backup of your database, so I recommend looking at the size of your database and choose the appropriate amount of disk space when you’re setting up the new instance.

4. Install the following tools on your Linux EC2 instance:

5. Attach the IAM role to your EC2 instance.

6. Create a VPC Security Group which allows your EC2 instance and RDS-hosted database to successfully communicate with each other.

Note: If you’re running Jamf Pro in AWS and you’re hosting your database in RDS, you likely have a security group like this set up already. Otherwise, your Jamf Pro server wouldn’t be able to communicate with the database.

7. Add the EC2 instance to the VPC Security Group which allows access to your RDS database.

Once all of the preparation work has been completed, use the following procedure to set up the backup process:

Note: For the purposes of this post, I’m using Red Hat Enterprise Linux (RHEL) as the Linux distro. If using another Linux distro, be aware that you may need to make adjustments for application binaries being stored in different locations than they are on RHEL.

Setting up MySQL authentication

1. Log into your EC2 instance.

2. Run the following command to change to a shell which has root privileges.

sudo -s

3. Create a MySQL connection named local using a command similar to the one below:

mysql_config_editor set --login-path=local --host=rds.database.server.url.goes.here --user=username --password

You’ll then be prompted for the password to the Jamf Pro database.

For example, if your Jamf Pro database has the following RDS URL and username:

  • URL: jamfprodb.dcjkudz4hlph.eu-west-1.rds.amazonaws.com
  • Username: jamfsw03

The following command would be used to create the MySQL connection:

mysql_config_editor set --login-path=local --host=jamfprodb.dcjkudz4hlph.eu-west-1.rds.amazonaws.com --user=jamfsw03 --password

Running this command should create a file named .mylogin.cnf in root’s home directory. To see the contents of the MySQL connection file and verify that it’s set up correctly, run the following command:

mysql_config_editor print --login-path=local

That should produce output which looks similar to what’s shown below:

[local]
user = jamfsw03
password = *****
host = jamfprodb.dcjkudz4hlph.eu-west-1.rds.amazonaws.com

Note: The reason for creating the MySQL connection is so we don’t need to store the database password as plaintext in the script.

Creating the backup script

1. Once the MySQL connection has been created, copy the script below and store it as /usr/local/bin/aws_mysql_database_backup.sh.

This script has several variables that will need to be edited. For example, if your Jamf Pro database is named jamfprodb, the S3 bucket you created is named jamfpro-database-backup and the MySQL connection you set up is named local, the following variables would look like this:

# Enter name of the RDS database being backed up

database_name=jamfprodb

# Enter name of the S3 bucket

S3_bucket=jamfpro-database-backup

# Enter the MySQL connection name

mysql_connection_name=local

This script is also available via the link below:

https://github.com/rtrouton/aws_scripts/tree/master/rds_mysql_backup_to_s3_bucket

2. Make the script executable by running the following command with root privileges:

chmod 755 /usr/local/bin/aws_mysql_database_backup.sh

3. Ensure that root owns the file by running the following command with root privileges:

chown root:root /usr/local/bin/aws_mysql_database_backup.sh

Note: The mysqldump command used in the script is set up with the following options:

  • – -max-allowed-packet=1024M
  • – -single-transaction
  • – -routines
  • – -triggers

– -max-allowed-packet=1024M: This specifies a max_allowed_packet value of 1 GB for mysqldump. This allows the packet buffer limit for mysqldump to grow beyond its default 4 MB limit to the 1 GB limit specified by the max_allowed_packet value.

– -single-transaction: Generates a checkpoint that allows the dump to capture all data prior to the checkpoint while receiving incoming changes. Those incoming changes do not become part of the dump. That ensures the same point-in-time for all tables.

– -routines: Dumps all stored procedures and stored functions.

– -triggers: Dumps all triggers for each table that has them.

These options are designed for use with InnoDB tables and provides an exact point-in-time snapshot of the data in the database. These options also do not require the MySQL tables to be locked, which in turn allows the Jamf Pro database to continue to work normally while the backup is taking place.

Scheduling the database backup:

You can set up a nightly database backup using cron. For example, if you wanted to set up a database backup to run daily at 11:30 PM, you can use the procedure below to set that up.

1. Export existing crontab by running the following command with root privileges:

crontab -l > /tmp/crontab_export

2. Export new crontab entry to exported crontab file by running the following command with root privileges:

echo "30 23 * * * /usr/local/bin/mysql_database_backup.sh 2>&1" >> /tmp/crontab_export

3. Install new cron file using exported crontab file by running the following command with root privileges:

crontab /tmp/crontab_export


Once everything is set up and ready to go, you should see your database backups and associated logs begin to appear in your S3 bucket.

Screen Shot 2020-02-15 at 10.52.51 PM

Fixing Homebrew’s rsyslog on macOS Catalina

$
0
0

As part of some recent testing, I needed to install rsyslog and the instructions I had referenced using Homebrew to do it. I used the following procedure to do it:

1. Set up a new VM running macOS 10.15.3 in VMware Fusion.

2. Inside the VM, open Terminal and install Homebrew by running the following command:

/usr/bin/ruby -e "$(curl -fsSL https://raw.githubusercontent.com/Homebrew/install/master/install)"

3. Once Homebrew was installed, install rsyslog by running the following command:

brew install rsyslog

4. Copy a pre-configured rsyslog.conf file to /usr/local/etc/rsyslog.conf.

5. Set the following permissions on /usr/local/etc/rsyslog.conf:

File permissions

Owner: root - read, write
Group: wheel - read
Everyone: read

6. Start rsyslog by running the following command with root privileges:

brew services start rsyslog

When I checked on rsyslog though, it wasn’t running or accepting logs from remote Macs like it should be. What had happened?

For more details, please see below the jump.

When I checked the system log, I saw a number of entries which looked like this:

Screen Shot 2020 02 26 at 9 19 30 AM

The rsyslogd process was starting and crashing almost immediately. To stop rsyslog from attempting to launch again, I ran the following commands with root privileges:

brew services stop rsyslog

After that, I started investigating to figure out what had gone wrong.. Since the problem happened almost immediately after launch, I suspected a problem with how rsyslog was being launched. The LaunchD item which starts rsyslog is /usr/local/Cellar/rsyslog/8.2001.0/homebrew.mxcl.rsyslog.plist and it looks like this:

From there, I was able to see the command that was being used to start rsyslog:

/usr/local/opt/rsyslog/sbin/rsyslogd -n -f /usr/local/etc/rsyslog.conf -i /usr/local/var/run/rsyslogd.pid

Next, I tried to run this command manually with root privileges:

/usr/local/opt/rsyslog/sbin/rsyslogd -n -f /usr/local/etc/rsyslog.conf -i /usr/local/var/run/rsyslogd.pid

When I did so, I got the following output:

Screen Shot 2020 02 26 at 9 17 05 AM

When I checked on /usr/local/var/run, I discovered that the /usr/local/var/run directory didn’t exist. Since it didn’t exist, rsyslogd couldn’t write the following file to it:

/usr/local/var/run/rsyslogd.pid

To fix this, I ran the following command to create the directory:

mkdir -p /usr/local/var/run

Once the /usr/local/var/run directory existed, I ran the following command with root privileges:

brew services start rsyslog

This time, rsyslog started without a problem and I was able to continue with my testing.

Apple making changes to maximum lifetime limits for SSL certificates as of September 2020

$
0
0

All SSL certificates have a set amount of time which they’re good for, which means that at some point they expire. As an example, the SSL certificate currently used by www.apple.com has the following expiration date and time:

Friday, October 23, 2020 at 8:00:00 AM Eastern Daylight Time

Screen Shot 2020 03 05 at 4 41 31 PM

As of today, March 5th 2020, the maximum lifetime for publicly trusted SSL certificates is 825 days, or roughly 27 months.

Apple has announced that, starting on September 1, 2020 at 00:00 GMT/UTC, all new SSL certificates being issued by specific Root Certificate Authorities (Root CAs) must not have a maximum lifetime longer than 398 days, or roughly 13 months, in order to be accepted as a valid certificate on Apple’s iOS, iPadOS, macOS, watchOS, and tvOS operating systems.

Screen Shot 2020 03 05 at 4 27 54 PM

What certificates are affected?

This does not affect all SSL certificates. It will affect certificates issued on or after the September 1, 2020 start date by the Root CAs which are preinstalled with Apple’s iOS, iPadOS, macOS, watchOS, and tvOS operating systems.

Since these CAs are installed along with the OS, the certificates issued by these Root CAs are trusted by Apple’s OSs without any additional work needed by the end user. These Root CAs include commercial SSL vendors like Go Daddy, DigiCert and other companies.

What certificates are not affected?

Certificates issued by the specified preinstalled Root CAs before the September 1, 2020 start date are not affected. If they have a lifespan longer than 398 days, Apple will continue to accept them as valid until their set expiration date as long as they were issued prior to September 1, 2020 at 00:00 GMT/UTC.

Certificates issued by Root CAs which do not come with the operating system are also not affected. So if your company, school or institution has their own Root CAs , SSL certificates issued by those CAs are not affected by the new maximum lifetime restriction. Those CAs can continue to issue SSL certificates with lifetimes longer than 398 days.

Note: These Root CAs are not trusted by default by Apple’s operating systems. Instead, the Root CA’s root certificate would need to be installed and set as a trusted root by either the user or a system administrator.

Does this affect anyone other than Apple?

As of now, this is a unilateral move by Apple which hasn’t been adopted by other vendors. That said, Google had proposed something similar in September 2019 so it would not be surprising to see Google also adopt this at some point.

Will this affect only web browsers?

SSL certificates are used by a variety of applications and tools to help provide secure communication, so the effects of this change will not be restricted to web browsers like Safari. Non-compliant certificates may result in network services or applications failing to work properly.

Jamf Pro Inventory Update and recon functions – alike, but not the same

$
0
0

As part of discussing the outcome of a troubleshooting session concerning Jamf Pro and profile deployment with a teammate, I learned that the two functions that Jamf Pro uses to update its computer inventory worked in a similar fashion, but they weren’t identical.

The differences turned out to be important for profile deployment. For more details, please see below the jump.

There’s a couple of ways that you can request a computer inventory using Jamf Pro:

1. Using the Jamf agent’s recon function

Screen Shot 2020 03 13 at 3 30 33 PM

2. Using a Jamf policy’s Update Inventory function.

Screen Shot 2020 03 13 at 3 32 31 PM

With regards to profiles, the two inventory update processes run the DeviceInformation MDM command at different times in the inventory gathering process, with relationship to when the inventory update process checks extension attributes.

When running an inventory update using the Update Inventory function in a Jamf Pro policy, the following items are run in this order:

  1. The DeviceInformation MDM command is run.
  2. Extension attributes are checked and updated.

When running an inventory update using the recon function of the Jamf agent, the following items are run in this order:

  1. Extension attributes are checked and updated.
  2. The DeviceInformation MDM command is run.

Why is this important?

If you have profiles scoped to the results of an extension attribute, having that extension attribute checked and updated before profile assignments change will result in that profile being deployed correctly once.

If the extension attribute hasn’t been checked before profile assignments change, you may see that profile not deploy, deploy based on what is incorrect information, or even deploy multiple times as first incorrect and then correct data comes in from the extension attribute.

What to do?

If you have profiles scoped to extension attributes, my recommendation is to use the Jamf agent’s recon function to run inventory updates. If you need to run an inventory as part of a policy, you can use the Jamf agent’s recon function to run an inventory update by using the following process:

  1. Select the policy in question.
  2. Go to the Files and Processes section.
  3. Go to the Execute Command blank.
  4. Enter the following command:
/usr/local/jamf/bin/jamf recon

Screen Shot 2020 03 13 at 4 14 13 PM

This will trigger the Jamf agent on the individual computers to run a recon using the Jamf agent.

Identifying which MDM server a Mac is enrolled with

$
0
0

Every so often, you may run across a Mac which is enrolled in an MDM server which is different from the one it should be. However, if you’re checking remotely, it may be difficult to identify which one it is.

To help with this task, there is a script available which will parse the MDM enrollment profile on your Mac and identify the DNS name of the MDM server. For more details, please see below the jump.

When run, the script should provide output similar to what’s shown below:

If enrolled with an MDM server:

username@computername ~ % sudo ./check_mdm_enrollment.sh
Password:
MDM server address: mdm.server.address.here
username@computername ~ %

Screen Shot 2020 03 18 at 12 09 09 PM


If not enrolled with an MDM server:

username@computername ~ % sudo ./check_mdm_enrollment.sh
Password:
Not enrolled in an MDM server.
username@computername ~ %

Screen Shot 2020 03 18 at 12 12 07 PM

The script is available below. It is also available from the following location on GitHub:

https://github.com/rtrouton/rtrouton_scripts/tree/master/rtrouton_scripts/check_mdm_enrollment


Disabling telemetry for Microsoft’s Visual Studio Code

$
0
0

Recently, I was tasked with figuring out how to disable telemetry for Microsoft’s Visual Studio Code. Normally, you can disable telemetry in a Microsoft application through using a macOS configuration profile or by using a defaults command. In this case though, Microsoft bought Visual Studio Code along with the rest of Xamarin, and Xamarin had some different ideas on where and how to store settings.

In the case of Visual Studio Code, the command to disable telemetry is stored as a .json file in the following location:

/Users/username_here/Library/Application Support/Code/User/settings.json

Screen Shot 2020 03 20 at 12 56 55 PM

After some research and some work with an open source tool named jq, I was able to figure out how to handle disabling the telemetry setting. For more details, please see below the jump.

The method I arrived at uses jq. This is a JSON manipulation tool which is not included with macOS, so I needed to install it separately before using it.

Once I had jq installed, I was able to write a script which did the following:

1. Checked to make sure the Mac in question was logged-in
2. Verified that the logged-in user was not the root user.
3. Verified that jq was installed at a location defined in the script and set as executable.
4. Checked for the existence of the settings.json file in /Users/username_here/Library/Application Support/Code/User.

If /Users/username_here/Library/Application Support/Code/User/settings.json is present, the script does the following:

A. Reads out the contents of the existing settings.json file.
B. Adds the following setting to the copied contents:

“telemetry.enableTelemetry”: false

C. Overwrites the existing settings.json file with the copied contents, which added the new telemetry setting.
D. Changes the ownership of the /Users/username_here/Library/Application Support/Code/User/settings.json file to that of the logged-in user.

If /Users/username_here/Library/Application Support/Code/User/settings.json is not present, the script does the following:

A. Creates the settings.json file in /Users/username_here/Library/Application Support/Code/User.
B. Adds the following setting to the newly-created file:

“telemetry.enableTelemetry”: false

C. Changes the ownership of the /Users/username_here/Library/Application Support/Code/User/settings.json file to that of the logged-in user.

5. Verifies that the telemetry.enableTelemetry setting is present and set to false.

The script is available below. It is also available from the following location on GitHub:

https://github.com/rtrouton/rtrouton_scripts/tree/master/rtrouton_scripts/disable_visual_studio_code_telemetry

Kernel extension warning dialogs in macOS Catalina 10.15.4

$
0
0

As part of macOS Catalina 10.15.4, Apple has begun displaying a new dialog window message concerning third-party kernel extensions. macOS Catalina is the last macOS to fully support the use of kernel extensions and these messages are meant to notify users of the following:

  • macOS had detected that a third-party kernel extension had been loaded.
  • The loaded kernel extension would be incompatible with an unspecified future version of macOS

Image  1

To further reinforce the message that kernel extensions are going away, Apple refers to them in the message window as “legacy system extensions”. System extensions were introduced as part of macOS Catalina and are Apple’s replacement for kernel extensions.

As of macOS 10.15.4, these messages are informational only and do not indicate that anything is wrong with the referenced third-party kernel extension. For more information, please see the link below:

https://support.apple.com/HT210999

Screen Shot 2020 03 25 at 8 55 48 AM

Blocking the messages

For a number of managed environments, these messages can be prevented from appearing. As long as a third-party kernel extension is whitelisted using an appropriate configuration profile, the message for it should not appear.

For more information about whitelisting kernel extensions using a configuration profile, please see the links below:

https://derflounder.wordpress.com/2018/04/12/whitelisting-third-party-kernel-extensions-using-profiles/
https://support.fleetsmith.com/hc/en-us/articles/360037495013-What-is-a-kernel-extension-
https://support.apple.com/guide/mdm/kernel-extension-policy-mdm88f99b98a/web

Booting to macOS Recovery or Diagnostics via Jamf Pro’s Self Service

$
0
0

One of the advantages provided by Jamf Pro’s Self Service is that you can use it to provide easy access to tools for your users or helpdesk folks. One such tool could be a script which helps folks boot to their Macs to one of the following Apple support services:

For more details, please see below the jump.

This script sets one of four boot arguments and passes it to NVRAM:

  • RecoveryModeDisk – Boots to the Recovery volume on your local boot drive
  • RecoveryModeNetwork – Boots to Internet Recovery
  • DiagsModeDisk – Boots to the Diagnostics or Apple Hardware Test volume on your local boot drive.
  • DiagsModeNetwork – Boots to Internet Diagnostics or Apple Hardware Test

Note: If booting to macOS Recovery, this script will set the logged-in account to have admin privileges. This is because, on Macs equipped with T2 security chips, an admin account is needed to be able to access the macOS Utilities tools in the Recovery environment.

Macos catalina recovery mode auth installer password

To set it up for use with Jamf Pro, do the following:

1. Add the script to Jamf Pro.

Screen Shot 2020 03 24 at 4 58 31 PM

Screen Shot 2020 03 24 at 4 58 35 PM

2. Create a new Self Service policy.

Screen Shot 2020 03 28 at 4 38 19 PM

Screen Shot 2020 03 24 at 5 02 19 PM

3. Select the script as part of the policy.
4. Set the policy’s Execution Frequency to Ongoing.

Screen Shot 2020 03 28 at 4 38 20 PM

5. Set target scope as desired.

Screen Shot 2020 03 24 at 5 03 17 PM

Note: While this script was written with Jamf Pro’s Self Service in mind, it should be adaptable with either no alteration or minor edits to other Self Service tools which can run scripts.

Once the policy is set up in Jamf Pro, it should look like this when run.

Screen Shot 2020 03 24 at 5 11 55 PM

Screen Shot 2020 03 24 at 5 12 03 PM

Screen Shot 2020 03 24 at 5 12 10 PM

When the Mac restarts, it should boot to Diagnostics or macOS Recovery (depending on your choices.)

Diagnostics checking mac

Screen Shot 2020 03 24 at 4 34 21 PM

The script is available below. It is also available from the following location on GitHub:

https://github.com/rtrouton/rtrouton_scripts/tree/master/rtrouton_scripts/set_recovery_or_diagnostics_boot_mode

Erasing a FileVault-encrypted T2-equipped Mac

$
0
0

Normally, reinstalling macOS on a Mac is a straightforward process:

1. Boot to macOS Recovery
2. Select Reinstall macOS from macOS Utilities.

Screen Shot 2020 04 06 at 2 09 13 PM

3. Follow the onscreen instructions.

However, if you have a Mac equipped with a T2 chip where FileVault is turned on, there’s an extra step involved. When you boot to macOS Recovery on a T2 Mac with FileVault on, you will be prompted for the password of an account on the Mac which has admin privileges.

Screen Shot 2020 04 06 at 4 47 19 PM

Screen Shot 2020 04 06 at 4 48 45 PM

If you don’t have the password to any of the accounts which appear, you can select the Forget all passwords? option.

Screen Shot 2020 04 06 at 4 47 20 PM

This will bring up a new screen where you can enter a FileVault Personal Recovery Key.

Screen Shot 2020 04 06 at 4 47 40 PM

If you can provide either the account password or the personal recovery key, the next thing you should see is the macOS Utilities screen.

Screen Shot 2020 04 06 at 2 09 13 PM


What if you don’t have either a password or a personal recovery key? Is your Mac now a paperweight? For more details, please see below the jump.

If you don’t have either an account password or recovery key available, you can erase the Mac’s boot drive without having to provide either. This way, the data stored in the encrypted drive can’t be touched but the Mac can still be rebuilt. To do this, please use the procedure shown below:

1. Boot to macOS Recovery
2. Click on the Recovery Assistant menu.

Screen Shot 2020 04 06 at 1 53 52 PM

3. Select Erase Mac…

Screen Shot 2020 04 06 at 1 54 25 PM

4. Select Erase Mac…

Screen Shot 2020 04 06 at 1 54 40 PM

5. Click the Erase Mac button.

Screen Shot 2020 04 06 at 1 55 14 PM

The Mac will erase the boot drive and reboot.


To reinstall the OS once the boot drive has been erased, use the procedure below:

1. Boot to macOS Recovery
2. Wait for the Mac to activate.

Screen Shot 2020 04 06 at 2 08 43 PM

Screen Shot 2020 04 06 at 2 08 47 PM

2. Select Reinstall macOS from macOS Utilities.

Screen Shot 2020 04 06 at 2 09 13 PM

4. Follow the onscreen instructions.

Upgrading from ESXi 6.7 to ESXi 7.0 via SSH and esxcli

$
0
0

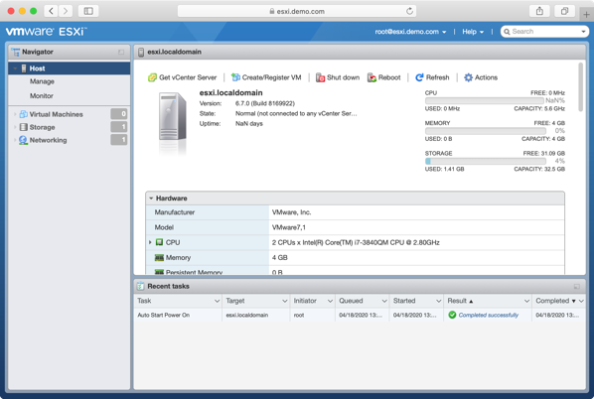
Following VMware’s release of ESXi 7.0, I upgraded my ESXi 6.7 server to ESXi 7.0 using SSH and esxcli. For those interested, see below the jump for the details of the process I used.

Screen Shot 2020 04 18 at 1 31 21 PM

To upgrade from ESXi 6.7 to 7.0 using esxcli:

1. Shut down all VMs running on your ESXi host machine.

2. Enable SSH on your ESXi host machine if this service is not already turned on.

Screen Shot 2020 04 18 at 1 31 39 PM

3. Connect via SSH and run the following command to enter maintenance mode:

vim-cmd /hostsvc/maintenance_mode_enter

Screen Shot 2020 04 18 at 1 35 10 PM

Screen Shot 2020 04 18 at 1 36 19 PM


4. After putting ESXi into maintenance mode, run the following command to set the correct firewall rules for the httpClient:

esxcli network firewall ruleset set -e true -r httpClient

Screen Shot 2020 04 18 at 1 36 43 PM

5. Next, run the following command to list the ESXi 7.0 updates available. You want the latest one that ends in “-standard” for your version of VMware.

esxcli software sources profile list -d https://hostupdate.vmware.com/software/VUM/PRODUCTION/main/vmw-depot-index.xml | grep ESXi-7.0.0

Screen Shot 2020 04 18 at 3 14 43 PM


6. Once you’ve identified the correct version of VMware (as of 4-19-2020, this is ESXi-7.0.0-15843807-standard), run the following command to download and install the update.

esxcli software profile update -d https://hostupdate.vmware.com/software/VUM/PRODUCTION/main/vmw-depot-index.xml -p ESXi-7.0.0-15843807-standard

Screen Shot 2020 04 18 at 3 22 03 PM

Note: It is very important that you run esxcli software profile update here. Running esxcli software profile install may overwrite drivers that your ESXi host needs.


7. Once the update has been installed and prompts you to reboot, run the following command to restart:

reboot


Screen Shot 2020 04 18 at 4 08 11 PM

8. After your ESXi host restarts, connect via SSH and run the following command to exit maintenance mode:

vim-cmd /hostsvc/maintenance_mode_exit

Screen Shot 2020 04 18 at 10 55 32 PM

At this point, your ESXi host should be upgraded to ESXi 7.0.0.

Screen Shot 2020 04 18 at 9 41 17 PM

Enabling Safari to successfully connect after changing a self-signed certificate

$
0
0

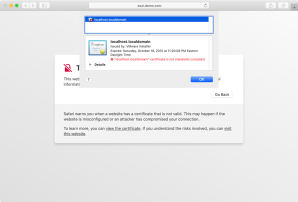
Every so often, I need to use Safari to access something which is using a self-signed certificate. When I do so, Safari now walks you through the following procedure:

  1. Warns you something’s not right and give you the option of either going back or seeing the details.
  2. If you choose to see the details, Safari will let you view the certificate.

Screen Shot 2020 04 18 at 11 27 14 PM

Safari will also give you the option of proceeding anyway.

Screen Shot 2020 04 18 at 11 27 32 PM

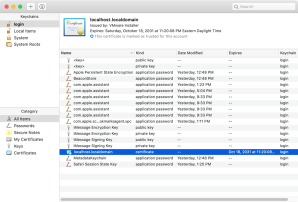
If you choose to proceed anyway, Safari will store the self-signed certificate in your login keychain and mark it as trusted.

Screen Shot 2020 04 19 at 2 07 29 PM

With this certificate now marked as trusted, Safari will allow you to visit the website.

Screen Shot 2020 04 18 at 11 27 43 PM

However, what happens when the SSL certificate changes but keeps the same subject name? At this point, connections from Safari to the site will fail with an error message similar to the one described below:

Safari Can’t Open the Page
Safari can’t open the page because Safari can’t establish a secure connection to the server “server.name.here”.

Screen Shot 2020 04 18 at 11 23 11 PM

The reason that this message appears is because Safari is using HTTP Strict Transport Security, otherwise known as HSTS. One of the requirements of HSTS as implemented by Safari is that if the security of the connection cannot be ensured, Safari must terminate the connection and should not allow the user to access the web application.

Since the self-signed certificate stored in your login keychain and the SSL certificate being received don’t match each other, that tells Safari that the certificate being received can’t be trusted. The result is Safari immediately terminates the connection and displays an error message like the one shown above.

However, what if the certificate changing is known behavior and you know that proceeding is safe? It’s possible to re-set Safari’s behavior, but it’s not intuitive. For more details, please see below the jump.

In my case, the certificate change is because I was switching between test instances of VMware’s ESXi hypervisor, which includes a web admin console which by default is protected by a self-signed certificate which is generated when you install ESXi. Because I had multiple ESXi test instances and wanted to use the same domain name for each, I had multiple unique self-signed SSL certificates which all happened to share the same DNS name: esxi.demo.com

What that meant is that for the first instance, I was given the option of storing the SSL certificate in my login keychain and I could thereafter connect to the first instance. But after doing that for first instance, I couldn’t then connect to the others because of HSTS.

To fix this, I used the following procedure:

1. Quit Safari

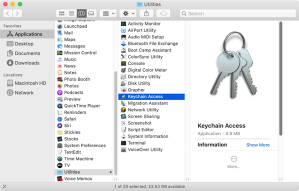
2. Open /Applications/Utilities and launch Keychain Access.app

Screen Shot 2020 04 19 at 2 06 31 PM

3. Select the login keychain.

4. Identify the self-signed certificate which Safari stored in the keychain.

Screen Shot 2020 04 19 at 2 07 29 PM

5. Delete the self-signed certificate.

Screen Shot 2020 04 18 at 11 25 53 PM

Note: If you are running macOS Mojave or macOS Catalina, you will also need to run steps 6 through 13 to enable Terminal to have Full Disk Access. Otherwise, skip to step 14.

6. Open System Preferences.

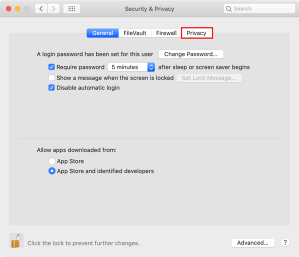
7. Choose the Security & Privacy preference pane.

Screen Shot 2020 04 19 at 2 30 45 PM

8. Select the Privacy tab.

Screen Shot 2020 04 19 at 2 31 23 PM

9. Click the lock icon in the lower left corner of the preference panel and authenticate with an admin account’s credentials.

Screen Shot 2020 04 19 at 2 34 28 PM

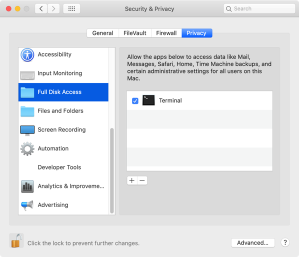
10. Select Full Disk Access.

11. Click the [+] plus button.

12. Select /Applications/Utilities/Terminal.app.

Screen Shot 2020 04 18 at 9 43 46 PM

13. If needed, quit and relaunch Terminal.

Note: All of the commands referenced below should be run as the logged-in user. Do not run them as root.

14. Open Terminal

15. Run the following command to stop Safari’s HTTP Storage Manager.

killall nsurlstoraged

Screen Shot 2020 04 18 at 11 24 27 PM

16. Run a command similar to the one shown below to remove the server address from the Safari’s list of accepted self-signed sites:

/usr/libexec/PlistBuddy -c "Delete :com.apple.CFNetwork.defaultStorageSession:server.name.goes.here" $HOME/Library/Cookies/HSTS.plist

For example, if the server name is esxi.demo.com, the command would look like this:

/usr/libexec/PlistBuddy -c "Delete :com.apple.CFNetwork.defaultStorageSession:esxi.demo.com" $HOME/Library/Cookies/HSTS.plist

Screen Shot 2020 04 18 at 11 24 40 PM

17. Run the following command to start Safari’s HTTP Storage Manager again:

launchctl start /System/Library/LaunchAgents/com.apple.nsurlstoraged.plist

Screen Shot 2020 04 19 at 2 39 44 PM

To test this, open Safari and try connecting again to your site. It should now walk you through the procedure of storing the self-signed certificate and allowing you to connect again.

Screen Shot 2020 04 18 at 11 26 52 PM

Screen Shot 2020 04 18 at 11 27 32 PM

Screen Shot 2020 04 18 at 11 27 43 PM


Removing the Restart Options section from Jamf Pro policies using the API

$
0
0

As part of setting up new Jamf Pro policies, the Restart Options section is automatically added to newly-created policies.

Screen Shot 2020 05 14 at 5 41 49 PM

For policies which don’t need it though, this section should be removed as a best practice to avoid accidental triggering of a restart where one isn’t needed or wanted. In some cases, the options provided by this section are never needed and it may be useful to be able to remove the Restart Options section from all of your current Jamf Pro policies.

In those cases, depending on how many policies you have, it can be tedious to have to do them one at a time using the admin console. However, with the right API calls in a script, it’s straightforward to perform these tasks using the Jamf Pro API. For more information, please see below the jump.

To disable a Jamf Pro policy, you can use curl to send an API call similar to the one shown below:

As an example, here’s how the API call would look if using the following information to remove the restart options from a specified Jamf Pro policy:

  • Jamf Pro server: https://jamfpro.demo.com
  • Jamf Pro username: jpadmin
  • Jamf Pro username’s password: Password1234
  • Jamf Pro policy ID number: 27

Since running the API calls individually may get tedious, I’ve written a script to assist with these tasks. This script is designed to use the Jamf Pro API to do the following:

  • Identify the individual IDs of all computer policies stored on a Jamf Pro server
  • Remove the restart options of the individual policies using their policy ID
  • Display HTTP return code and API output

When the script is run, you should see output similar to that shown below.

Screen Shot 2020 05 14 at 5 19 37 PM

Because these scripts affect all policies on the Jamf Pro server, the scripts will ask you to confirm that you want to do this by typing the following when prompted:

YES

Any other input will cause the script to exit.

Screen Shot 2020 05 14 at 5 21 43 PM

If the script is successful, you should see output like this for each policy.

The script is available from following address on GitHub:

https://github.com/rtrouton/rtrouton_scripts/tree/master/rtrouton_scripts/Casper_Scripts/Jamf-Pro-Remove-Restart-Options-From-All-Policies


Slides from the “SAP In The Haus” session at Futureproof IT 2020

Removing restart options from all Jamf Pro policies in a specified category

$
0
0

As a follow-on to my previous post on removing the Restart Options section from Jamf Pro policies, I’ve written a script to target the policies in a particular Jamf Pro category. For more details, please see below the jump.

This script is designed to do the following:

  1. List all categories on a Jamf Pro server.
  2. Allow a category to be specified.
  3. List all policies (if any) associated with that category.
  4. Confirm that the restart options should be removed from all policies in that category.
  5. Remove the restart options from all policies in that category.

When the script is run, you should see output similar to that shown below.

You’ll be requested to enter the name of a category.

Screen Shot 2020 05 22 at 10 27 57 AM


You’ll be asked to confirm that you want to remove the restart options from the relevant policies.

Screen Shot 2020 05 22 at 10 29 35 AM


Once confirmed, the restart options will be removed.

Screen Shot 2020 05 22 at 10 31 06 AM


The script is available from following address on GitHub:

https://github.com/rtrouton/rtrouton_scripts/tree/master/rtrouton_scripts/Casper_Scripts/Jamf-Pro-Remove-Restart-Options-From-All-Policies-In-Specified-Category

Identifying and deleting Jamf Pro inventory records with duplicate serial numbers

$
0
0

I recently saw an issue where several computers in Jamf Pro were showing up with the same serial number listed in their inventory records. This made it difficult to work with this serial number using the API because Jamf Pro Classic API calls may fail if we’re referencing the serial number in the API call and more than one inventory record exists with that serial number.

First off, how can this happen? Aren’t serial numbers supposed to be unique? They are, but there’s two instances where serial numbers may unfortunately be associated with more than one Mac.

Hardware repair:

When you send a Mac out for repair and the logic board is replaced as part of the repair, the Mac’s existing serial number is flashed onto the replacement logic board.

However, both the old and new logic boards have separate Unique Device Identifiers (UDID) associated with them. When enrolling a device into Jamf Pro, it is possible for a new inventory record to be set up if a device has:

  • The same serial number listed in as an existing inventory record
  • A UDID not found in other inventory records

Parallels macOS virtual machine:

macOS virtual machines set up by Parallels Desktop and other Parallels hypervisor products use the same serial number as the Mac which is running the Parallels hypervisor software. These VMs will likewise have separate Hardware UDIDs associated with them.

So what to do with these duplicate records? My recommendation is to delete them from your Jamf Pro server when you find them, especially if you do a lot of work using the API. To help with this task, a script has been developed to identify and delete unwanted duplicates. For more details, please see below the jump.

This script downloads all computer inventory records from a Jamf Pro server. The list of records is then parsed for inventory records with the same Apple serial number as at least one other record.

Once the duplicate serial numbers are identified, the script takes the following actions:

  1. Loop through the duplicate serial number list and get all of the associated Jamf Pro computer IDs
  2. Loop through the Jamf Pro IDs and identify the IDs with the most recent enrollment dates.
  3. Verify that the individual Jamf Pro IDs are associated with Macs, as opposed to virtual machines running macOS.
  4. Loop through the list of identified Macs with Jamf Pro IDs and delete all Macs except for the one with the most recent enrollment date.
  5. Create a report in tab-separated value (.tsv) format which contains the following information about the deleted Macs.
  • Jamf Pro ID
  • Manufacturer
  • Model
  • Serial Number
  • Hardware UDID

For authentication, the script can accept hard-coded values in the script, manual input or values stored in a ~/Library/Preferences/com.github.jamfpro-info.plist file.

The plist file can be created by running the following commands and substituting your own values where appropriate:

To store the Jamf Pro URL in the plist file:

defaults write com.github.jamfpro-info jamfpro_url https://jamf.pro.server.goes.here:port_number_goes_here

To store the account username in the plist file:

defaults write com.github.jamfpro-info jamfpro_user account_username_goes_here

To store the account password in the plist file:

defaults write com.github.jamfpro-info jamfpro_password account_password_goes_here

When the script is run, you should see output which looks similar to this.

Screen Shot 2020 05 26 at 4 14 31 PM

The report generated in tab-separated value (.tsv) format should be openable natively by both Microsoft Excel and Apple Numbers.

Screen Shot 2020 05 26 at 4 33 53 PM

The script is available below and at the following address on GitHub:

https://github.com/rtrouton/rtrouton_scripts/tree/master/rtrouton_scripts/Casper_Scripts/Identify_and_Delete_Jamf_Pro_Inventory_Records_With_Duplicate_Serial_Numbers

Mac admin conferences in 2020

$
0
0

With COVID-19’s disruption of travel and public gatherings, a number of Mac admin conferences have made the choice to move to an online format. This change has meant that a number of conferences which previously required paying for tickets and travel costs have now become either much cheaper or free.

For those interested, here is the current list of conferences being held online between June and October 2020:

Penn State MacAdmins
Link: https://macadmins.psu.edu/campfire-sessions-2020/
Dates: June 4, 11, 18, 30 and July 9, 16, 23, 30
Cost: Free

MacDevOps YVR
Link: https://mdoyvr.com
Dates: June 10 – 12
Cost: CAD $135 (USD $97.74 as of May 29, 2020)

Apple WWDC
Link: https://developer.apple.com/wwdc20/
Dates: June 22 – 26
Cost: Free

Jamf Nation User Conference
Link: https://www.jamf.com/events/jamf-nation-user-conference/2020/
Dates: September 29 – October 1
Cost: Free

MacSysAdmin
Link: https://www.macsysadmin.se
Dates: October 2020 (exact dates not yet posted.)
Cost: Not yet announced

Slides from the “Introduction to MDM and Configuration Profiles” session at Penn State MacAdmins 2020

Viewing all 764 articles
Browse latest View live