Quantcast
Channel: rtrouton – Der Flounder
Viewing all 764 articles
Browse latest View live

Managing Java browser plug-in settings for Apple’s XProtect malware protection

$
0
0

In response to a number of recent Java exploits, both Apple and Mozilla have begun blocking vulnerable versions of Java from running in their respective browsers via their malware protection mechanisms. While this is the right move from a security perspective, it can leave enterprises without the ability to access mission-critical systems that use Java applets running in a browser.

The fix should be to update those affected machines with the latest version of Java. However, this assumes that a) the latest available version of Java is not itself blocked and b) the mission-critical system is able to use the latest version of Java.

From my own perspective, what Apple is doing from a malware protection standpoint is the right thing. I just don’t want my users to lose the ability to access our systems that use a Java applet, especially when the latest available version of Java is blocked and I don’t have a way to otherwise satisfy Apple’s XProtect malware protection without disabling XProtect.

My fix was this: manage XProtect’s ability to disable the Java browser plug-in by modifying the Java browser plug-in settings in the affected Mac’s /System/Library/CoreServices/CoreTypes.bundle/Contents/Resources/XProtect.meta.plist file. See below the jump for the details.

To handle this, I’ve written a LaunchDaemon and script combination. The LaunchDaemon runs the script at startup and also watches the Mac’s /System/Library/CoreServices/CoreTypes.bundle/Contents/Resources/XProtect.meta.plist file for changes. When XProtect.meta.plist is modified, the LaunchDaemon triggers the script to run again.


<?xml version="1.0" encoding="UTF-8"?>
<!DOCTYPE plist PUBLIC "-//Apple//DTD PLIST 1.0//EN" "http://www.apple.com/DTDs/PropertyList-1.0.dtd">
<plist version="1.0">
<dict>
	<key>Label</key>
	<string>com.company.xprotect_re-enable_java_6_and_7</string>
	<key>ProgramArguments</key>
	<array>
		<string>sh</string>
		<string>/Library/Scripts/xprotect_re-enable_java_6_and_7.sh</string>
	</array>
	<key>QueueDirectories</key>
	<array/>
	<key>RunAtLoad</key>
	<true/>
	<key>WatchPaths</key>
	<array>
		<string>/System/Library/CoreServices/CoreTypes.bundle/Contents/Resources/XProtect.meta.plist</string>
	</array>
</dict>
</plist>

The script will check the current Java 6 and Java 7 browser plug-in versions and compare them against the minimum version allowed by Apple’s XProtect malware protection. If the minimum Java version allowed by XProtect does not allow the current version of the Java browser plug-in on the Mac, the script will alter the Mac’s /System/Library/CoreServices/CoreTypes.bundle/Contents/Resources/XProtect.meta.plist file to set the minimum version allowed to match the current version of the Mac’s Java browser plug-in. This change allows the Mac’s current Java browser plug-in to run in Safari without being blocked. As the Java browser plug-in is updated, XProtect.meta.plist will be updated to match the new version of the plug-in.


#!/bin/sh

# This script will check the current Java 6 and Java 7 browser plug-in
# versions and compare them against the minimum version allowed by
# Apple's XProtect malware protection. If the minimum Java version 
# allowed by XProtect does not allow the current version of the Java
# browser plug-in on the Mac, the script will alter the Mac's 
# /System/Library/CoreServices/CoreTypes.bundle/Contents/Resources/XProtect.meta.plist 
# file to set the minimum version allowed to match the current version
# of the Mac's Java browser plug-in. This allows the Mac's current Java
# browser plug-in to run in Safari without being blocked.


osvers=$(sw_vers -productVersion | awk -F. '{print $2}')

javaVendor=`/usr/bin/defaults read "/Library/Internet Plug-Ins/JavaAppletPlugin.plugin/Contents/Info" CFBundleIdentifier`

CURRENT_JAVA_6_BUILD=`/usr/libexec/PlistBuddy -c "print :JavaVM:JVMVersion" "/Library/Java/Home/bundle/Info.plist"`
XPROTECT_JAVA_6_BUILD=`/usr/libexec/PlistBuddy -c "print :JavaWebComponentVersionMinimum" /System/Library/CoreServices/CoreTypes.bundle/Contents/Resources/XProtect.meta.plist`

CURRENT_JAVA_7_BUILD=`/usr/libexec/PlistBuddy -c "print :CFBundleVersion" "/Library/Internet Plug-Ins/JavaAppletPlugin.plugin/Contents/Info.plist"`
XPROTECT_JAVA_7_BUILD=`/usr/libexec/PlistBuddy -c "print :PlugInBlacklist:10:com.oracle.java.JavaAppletPlugin:MinimumPlugInBundleVersion" /System/Library/CoreServices/CoreTypes.bundle/Contents/Resources/XProtect.meta.plist`


#
# Check to see if Xprotect is blocking Apple's Java 6 browser plug-in and re-enable the plug-in if needed.
# Changes in this section are from Cengage Learning's re-enable_java_6 script: https://github.com/cengage
#

if [[ -e /System/Library/CoreServices/CoreTypes.bundle/Contents/Resources/XProtect.meta.plist ]]; then
	
	if [ ${CURRENT_JAVA_6_BUILD} != ${XPROTECT_JAVA_6_BUILD} ]; then

	 	  /usr/bin/logger "Current Java 6 build (${CURRENT_JAVA_6_BUILD}) does not match the minimum build required by Xprotect (${XPROTECT_JAVA_6_BUILD}). Setting current version as the minimum build."
	 	  /usr/bin/defaults write /System/Library/CoreServices/CoreTypes.bundle/Contents/Resources/XProtect.meta JavaWebComponentVersionMinimum -string "$CURRENT_JAVA_6_BUILD"
	 	  /usr/bin/plutil -convert xml1 /System/Library/CoreServices/CoreTypes.bundle/Contents/Resources/XProtect.meta.plist
	 	  /bin/chmod a+r /System/Library/CoreServices/CoreTypes.bundle/Contents/Resources/XProtect.meta.plist
	else
	 	  /usr/bin/logger "Current JVM build is ${CURRENT_JAVA_6_BUILD} and Xprotect minimum build is ${XPROTECT_JAVA_6_BUILD}, nothing to do here."
	fi


#
# Script checks to see if the Mac is running Mac OS X 10.7.x or higher. If it is, the 
# script checks to see if the Oracle Java browser plug-in is installed. If the Oracle 
# Java browser plug-in is installed and Xprotect is blocking the currently installed 
# version of Oracle's Java 7 browser plug-in, the script will re-enable the Java 7 
# browser plug-in.
# 
   
    if [[ ${osvers} -ge 7 ]]; then
      if [ "$javaVendor" = "com.oracle.java.JavaAppletPlugin" ]; then 
	 	if [ ${CURRENT_JAVA_7_BUILD} != ${XPROTECT_JAVA_7_BUILD} ]; then

	 	  /usr/bin/logger "Current Java 7 build (${CURRENT_JAVA_7_BUILD}) does not match the minimum build required by Xprotect (${XPROTECT_JAVA_7_BUILD}). Setting current version as the minimum build."
	 	  /usr/libexec/PlistBuddy -c "Set :PlugInBlacklist:10:com.oracle.java.JavaAppletPlugin:MinimumPlugInBundleVersion $CURRENT_JAVA_7_BUILD" /System/Library/CoreServices/CoreTypes.bundle/Contents/Resources/XProtect.meta.plist
	 	  /usr/bin/plutil -convert xml1 /System/Library/CoreServices/CoreTypes.bundle/Contents/Resources/XProtect.meta.plist
	 	  /bin/chmod a+r /System/Library/CoreServices/CoreTypes.bundle/Contents/Resources/XProtect.meta.plist
	    else
	 	  /usr/bin/logger "Current Oracle Java version is ${CURRENT_JAVA_7_BUILD} and Xprotect minimum version is ${XPROTECT_JAVA_7_BUILD}, nothing to do here."
		fi	
	  fi
    fi
fi
exit 0

The script has been tested on 10.6.8, 10.7.5 and 10.8.2, so it should cover all current OSs that use Apple’s XProtect malware protection.

The script and launchdaemon are available here on my GitHub repo: https://github.com/rtrouton/rtrouton_scripts/tree/master/rtrouton_scripts/xprotect_re-enable_java_6_and_7


Opening Finder windows from the Terminal

$
0
0

While working on the command line in Terminal, I occasionally need to open up a new Finder window so that I can take a look at something in the Finder. When this happens, the open command provides a useful shortcut to do so.

To open a new Finder window from the current directory in the Terminal, you would run the following command:

open .

For example, if you have navigated to the Pictures directory in your home folder, running this command would cause the Pictures directory to open in a new Finder window.

Screen Shot 2013-03-01 at 10.28.33 AM

Screen Shot 2013-03-01 at 10.26.25 AM

If you want to open a Finder window using Terminal for an alternate directory, you would run the following command:

open /path/to/directory

For example, if you wanted to access the XProtect.meta.plist file stored in the /System/Library/CoreServices/CoreTypes.bundle/Contents/Resources directory, you could run this command to open the /System/Library/CoreServices/CoreTypes.bundle/Contents/Resources directory in a new Finder window:

open /System/Library/CoreServices/CoreTypes.bundle/Contents/Resources

Screen Shot 2013-03-01 at 10.27.41 AM

Screen Shot 2013-03-01 at 10.28.06 AM


Using Apple Remote Desktop Admin to help script ARD kickstart options

$
0
0

Apple Remote Desktop is a tool that just about every Mac admin uses at some point. The client is built into OS X and it’s usually straightforward to turn on. It also includes a command line tool called kickstart which can be used to configure the Apple Remote Desktop client. The kickstart tool is useful because you can use it to script your configuration. That said, if you have a complex ARD configuration, getting the kickstart options correct can be tricky.

One way to help with this is to have Apple Remote Desktop Admin do the kickstart configuration work for you. See below the jump for the details.

Apple Remote Desktop Admin contains the option to create an Apple Remote Desktop client installer. This is available under the File menu as the Create Client Installer… option. This option can be leveraged to create a customized installer that contains the needed kickstart configuration.

1. Launch Apple Remote Desktop Admin

2. Select File: Create Client Installer…
Screen Shot 2013-03-07 at 4.10.52 PM

3. In the initial Create Client Installer window, select the Yes radio button under Would you like to customize?
Screen Shot 2013-03-07 at 4.10.58 PM

4. Select the customization options you want
Screen Shot 2013-03-07 at 4.11.14 PM

Screen Shot 2013-03-07 at 4.11.19 PM

5. When finished customizing, save your installer somewhere convenient.
Screen Shot 2013-03-07 at 5.06.43 PM

At this point, the kickstart configuration you need is buried deep inside the package in a file named postflight_kickstart_entries. Apple Remote Desktop Admin 3.6.1 saves its installers as a flat package, so you will need to use Pacifist or Apple’s pkgutil command-line tool to extract and access the postflight_kickstart_entries file. Here’s how to do this with pkgutil:

1. Open Terminal and run the following command to expand the contents of the Remote Desktop client installer into a new directory. In this example, I’m expanding the contents into a directory named ard

pkgutil –expand “/path/to/Custom Remote Desktop Installer.pkg” /path/to/ard

Screen Shot 2013-03-07 at 4.16.58 PM

2. Run the following command to access the kickstart configuration stored in the postflight_kickstart_entries file:

pico /path/to/ard/RemoteDesktopClient.pkg/Scripts/Tools/postflight_kickstart_entries
Screen Shot 2013-03-07 at 5.36.11 PM

Screen Shot 2013-03-07 at 4.22.21 PM
3. Copy the contents into a convenient text editor and add the appropriate path for the kickstart utility. You will likely also have to add the -targetdisk configuration option. Here’s an example of how this may look:


/System/Library/CoreServices/RemoteManagement/ARDAgent.app/Contents/Resources/kickstart -targetdisk / -activate -configure -clientopts -setmenuextra -menuextra yes -configure -users 'administrator' -access -on -privs -TextMessages -GenerateReports -RestartShutDown -SendFiles -ChangeSettings -configure -allowAccessFor -specifiedUsers -privs -DeleteFiles -TextMessages  -OpenQuitApps -GenerateReports -RestartShutDown -SendFiles -ChangeSettings -restart -agent -menu

Note: The kickstart entries will be on multiple lines, but will need to be combined into one line.

4. Once you have the kickstart configuration options you need, you can put them into a script or payload-free package for deployment to your Macs.


Managing Adobe Flash browser plug-in settings for Apple’s XProtect malware protection

$
0
0

As a follow-up to my earlier post about managing XProtect’s ability to block Java browser plug-ins , a Mac admin named scifiman sent me a launchdaemon and script to manage Adobe Flash using a similar method. Thanks, scifiman!


<?xml version="1.0" encoding="UTF-8"?>
<!DOCTYPE plist PUBLIC "-//Apple//DTD PLIST 1.0//EN" "http://www.apple.com/DTDs/PropertyList-1.0.dtd">
<plist version="1.0">
<dict>
  <key>Label</key>
	<string>com.company.xprotect_re-enable_adobe_flash</string>
	<key>ProgramArguments</key>
	<array>
		<string>sh</string>
		<string>/Library/Scripts/xprotect_re-enable_adobe_flash.sh</string>
	</array>
	<key>QueueDirectories</key>
	<array/>
	<key>RunAtLoad</key>
	<true/>
	<key>StartInterval</key>
	<integer>900</integer>
	<key>WatchPaths</key>
	<array/>
</dict>
</plist>


#!/bin/sh

# This script is a modified version of rtrouton's re-enable_java_6_and_7 script.
# This script will check the current Adobe Flash browser plug-in
# version and compare it against the minimum version allowed by
# Apple's XProtect malware protection. If the minimum Flash version
# allowed by XProtect does not allow the current version of the Flash
# browser plug-in on the Mac, the script will alter the Mac's
# /System/Library/CoreServices/CoreTypes.bundle/Contents/Resources/XProtect.meta.plist
# file to set the minimum version allowed to match the current version
# of the Mac's Flash browser plug-in. This allows the Mac's current Flash
# browser plug-in to run in Safari without being blocked.
#
# Original script is from here:
# https://gist.github.com/scifiman/5109047
#

osvers=$(sw_vers -productVersion | awk -F. '{print $2}')

# javaVendor=`/usr/bin/defaults read "/Library/Internet Plug-Ins/JavaAppletPlugin.plugin/Contents/Info" CFBundleIdentifier`

CURRENT_FLASH_BUILD=`/usr/libexec/PlistBuddy -c "print :CFBundleShortVersionString" /Library/Internet\ Plug-Ins/Flash\ Player.plugin/Contents/Info.plist`
XPROTECT_FLASH_BUILD=`/usr/libexec/PlistBuddy -c "print :PlugInBlacklist:10:com.macromedia.Flash\ Player.plugin:MinimumPlugInBundleVersion" /System/Library/CoreServices/CoreTypes.bundle/Contents/Resources/XProtect.meta.plist`

#
# Check to see if Xprotect is blocking Adobe's Flash browser plug-in and re-enable the plug-in if needed.
# Changes in this section are from Pepijn Bruienne's re-enable_java_6 script: https://github.com/bruienne
#

if [[ -e /System/Library/CoreServices/CoreTypes.bundle/Contents/Resources/XProtect.meta.plist ]]; then

	if [ ${CURRENT_FLASH_BUILD} != ${XPROTECT_FLASH_BUILD} ]; then

	 	  /usr/bin/logger "Current Flash build (${CURRENT_FLASH_BUILD}) does not match the minimum build required by Xprotect (${XPROTECT_FLASH_BUILD}). Setting current version as the minimum build."
	 	  /usr/libexec/PlistBuddy -c "Set :PlugInBlacklist:10:com.macromedia.Flash\ Player.plugin:MinimumPlugInBundleVersion $CURRENT_FLASH_BUILD" /System/Library/CoreServices/CoreTypes.bundle/Contents/Resources/XProtect.meta.plist
	 	  /usr/bin/plutil -convert xml1 /System/Library/CoreServices/CoreTypes.bundle/Contents/Resources/XProtect.meta.plist
	 	  /bin/chmod a+r /System/Library/CoreServices/CoreTypes.bundle/Contents/Resources/XProtect.meta.plist
	else
	 	  /usr/bin/logger "Current Flash build is ${CURRENT_FLASH_BUILD} and Xprotect minimum build is ${XPROTECT_FLASH_BUILD}, nothing to do here."
	fi
fi

exit 0

The script has been tested on 10.6.8, 10.7.5 and 10.8.2, so it should cover all current OSs that use Apple’s XProtect malware protection.

Scifiman’s original gist is available here:

https://gist.github.com/scifiman/5109047

I’m hosting a copy of the script and launchdaemon here on my GitHub repo:

https://github.com/rtrouton/rtrouton_scripts/tree/master/rtrouton_scripts/xprotect_re-enable_adobe_flash


Checking for accounts with Remote Management rights

$
0
0

Something a number of Mac admins need to know about the Macs in their environment is being able to detect which accounts have remote management rights on a particular Mac. Crafty users can be inventive about finding ways to grant themselves remote management rights, so admins need to be just as perceptive about identifying which accounts have remote management rights.

To help with the task of identifying which accounts have remote management rights, I’ve written a script to detect which local accounts had remote rights on a particular Mac.


#!/bin/sh

# Determines if the Remote Management settings are set
# for "All Users" or for "Only these users:" in System
# Preferences' Sharing preference pane

ARD_ALL_LOCAL=`/usr/bin/defaults read /Library/Preferences/com.apple.RemoteManagement ARD_AllLocalUsers`

# Lists all local user accounts on the Mac with a UID 
# of greater or equal to 500 and less than 1024. This 
# should exclude all system accounts and network accounts
# 
# List is displayed if the "All Users" setting is 
# set in the Remote Management settings.

ALL_ID500_PLUS_LOCAL_USERS=`/usr/bin/dscl . list /Users UniqueID | awk '$2 >= 500 && $2 < 1024 { print $1; }'`

# Lists all user accounts on the Mac that have been given
# explicit Remote Management rights. List is displayed if 
# the "Only these users:" setting is set in the Remote 
# Management settings.

REMOTE_MANAGEMENT_ENABLED_USERS=`/usr/bin/dscl . list /Users naprivs | awk '{print $1}'`


if [ "$ARD_ALL_LOCAL" = "1" ]; then
        result=$ALL_ID500_PLUS_LOCAL_USERS
elif [ "$ARD_ALL_LOCAL" = "0" ]; then
        result=$REMOTE_MANAGEMENT_ENABLED_USERS
fi

# Displays list of accounts that have 
# been given Remote Management rights

echo $result

I’ve posted the script here on my GitHub repo:
https://github.com/rtrouton/rtrouton_scripts/tree/master/rtrouton_scripts/check_for_remote_management_accounts

I’ve also modified it for use as an Casper Extension attribute. I’ve posted it here on my GitHub repo:
https://github.com/rtrouton/rtrouton_scripts/tree/master/rtrouton_scripts/Casper_Extension_Attributes/check_for_remote_management_accounts


Automatically enable the Java web plug-ins setting in Safari 6.0.3 and later

$
0
0

One of the features of Apple’s Safari 6.0.3 update is that it turns off the automatic execution of Java applets through Safari, even if the Java browser plug-in is otherwise enabled.

Safari 6.0.3 does allow for the automatic execution of Java applets to be re-enabled through the browser. However, if it’s been a while since a Java applet was launched, then automatic execution of Java applets is once again automatically disabled.

This was going to be an issue at my workplace, as we have a couple of applications that rely on Java applets running through the browser. Fortunately, I already had a fix for this issue; it just needed to be updated with some additional commands.

To make this work, I’ve written a script and launch agent combination. The script will perform a couple of tasks:

1. Set the com.apple.WebKit.JavaPlugInLastUsedTimestamp plist key in ~/Library/Preferences/.GlobalPreferences.plist

2. Enable the Enable applet plug-in and Web Start Applications setting in the Java Preferences application.


#!/bin/sh

# DYNAMICALLY SET THE UUID FOR THE BYHOST FILE NAMING
if [[ `ioreg -rd1 -c IOPlatformExpertDevice | grep -i "UUID" | cut -c27-50` == "00000000-0000-1000-8000-" ]]; then
        MAC_UUID=`ioreg -rd1 -c IOPlatformExpertDevice | grep -i "UUID" | cut -c51-62 | awk {'print tolower()'}`
elif [[ `ioreg -rd1 -c IOPlatformExpertDevice | grep -i "UUID" | cut -c27-50` != "00000000-0000-1000-8000-" ]]; then
        MAC_UUID=`ioreg -rd1 -c IOPlatformExpertDevice | grep -i "UUID" | cut -c27-62`
fi

# Enable Java browser plug-ins in Safari 6.0.3 and later
# for the current user by setting the com.apple.WebKit.JavaPlugInLastUsedTimestamp
# key in ~/Library/Preferences/.GlobalPreferences.plist

/usr/libexec/PlistBuddy -c "Delete :com.apple.WebKit.JavaPlugInLastUsedTimestamp" $HOME/Library/Preferences/.GlobalPreferences.plist
/usr/libexec/PlistBuddy -c "Add :com.apple.WebKit.JavaPlugInLastUsedTimestamp real $(( $(date "+%s") - 978307200 ))" $HOME/Library/Preferences/.GlobalPreferences.plist
/usr/bin/plutil -convert xml1 $HOME/Library/Preferences/.GlobalPreferences.plist

# Set the the "Enable applet plug-in and Web Start Applications" setting in
# the Java Preferences for the current user.

/usr/libexec/PlistBuddy -c "Delete :GeneralByTask:Any:WebComponentsEnabled" $HOME/Library/Preferences/ByHost/com.apple.java.JavaPreferences.${MAC_UUID}.plist
/usr/libexec/PlistBuddy -c "Add :GeneralByTask:Any:WebComponentsEnabled bool true" $HOME/Library/Preferences/ByHost/com.apple.java.JavaPreferences.${MAC_UUID}.plist
/usr/libexec/PlistBuddy -c "Delete :GeneralByTask:Any:WebComponentsLastUsed" $HOME/Library/Preferences/ByHost/com.apple.java.JavaPreferences.${MAC_UUID}.plist
/usr/libexec/PlistBuddy -c "Add :GeneralByTask:Any:WebComponentsLastUsed real $(( $(date "+%s") - 978307200 ))" $HOME/Library/Preferences/ByHost/com.apple.java.JavaPreferences.${MAC_UUID}.plist
/usr/bin/plutil -convert xml1 $HOME/Library/Preferences/ByHost/com.apple.java.JavaPreferences.${MAC_UUID}.plist

# Forces preferences to be re-read

/usr/bin/killall cfprefsd

The LaunchAgent runs the script on login to any user account with the logging-in user’s privileges and permissions.

You can find the updated script here on my GitHub repo:

https://github.com/rtrouton/rtrouton_scripts/tree/master/rtrouton_scripts/enable_java_web_plugins_at_login


Setting the default boot drive from the boot volume menu

$
0
0

This has been previously documented in a few places, but I just ran across this handy way to set the default boot drive from the boot volume menu.

When you start up a Mac holding down the Option key, the boot volume menu appears and displays all available bootable volumes. When you select a drive by clicking on it or selecting it with the arrow keys on your keyboard, it’ll boot from that drive until the next reboot. At the next reboot, unless you hold down the Option key again, the Mac will boot from whatever drive was set in the Startup Disk preference pane to be the default boot drive.

photo 1-1

However, there’s also a way to change the default boot volume from the boot volume menu. In this case, once you got to the boot volume menu, you can let go of the Option key, then hold down the Control key. At that point, you should see the upward arrow icon that points at the currently selected drive turn into a circular arrow.

photo 2-1

Once you select that drive and boot from it, it will now also be set as the Mac’s default boot drive.


Migrating OS X VMs to a VMware ESXi server

$
0
0

I’ve started using ESXi servers more and more for hosting my test Macs, both here and at work. As part of that, I’ve found it to be considerably easier for me to build the VM inside of VMware Fusion on my Mac and move it to ESXi, then build it from scratch on my ESXi server.

That said, I’ve found the process for moving OS X VMs has not been straightforward. When I first tried moving 10.8.x VMs, I tried both VMware’s OVF Tool and VMware’s Standalone Converter, but neither initially appeared to provide me with the ability to transfer working OS X 10.8.x VMs.

In the end, I was able to find a way to use VMware’s Standalone Converter to transfer 10.8.x VMs, but the process involves some extra steps on the ESXi server’s end.

The process I’ve developed involves using a Windows 7 VM running inside of VMware Fusion, with the VMware Standalone Converter application installed. One thing to note before proceeding further is that I did not try this with a vSphere server. All my work has been done with VMware’s free ESXi server, so it may be that there’s an easier way to do this with vSphere. See below the jump for details.

1. Launch Standalone Converter and select Convert Machine.

Screen Shot 2013-04-05 at 8.32.25 PM

2. For Select source type: , select VMware Workstation or other VMware virtual machine then hit the Browse button.

Screen Shot 2013-04-06 at 5.24.57 PM

3. Locate the .vmx file stored inside your VMware Fusion VM and select it.

Screen Shot 2013-04-05 at 8.33.19 PM

4. Once the .vmx file is selected, hit the Open button.

Screen Shot 2013-04-05 at 8.33.24 PM

5. Verify that everything looks OK at the Source System window, then hit the Next button.

Screen Shot 2013-04-05 at 8.33.33 PM

6. For Select destination type:, select VMware Infrastructure virtual machine. Once done, supply the login credentials for the ESXi server that you want to copy the VM to and hit the Next button when finished.

Screen Shot 2013-04-05 at 8.34.01 PM

7. If the ESXi server is using a self-signed SSL certificate, a warning will appear. Click the Ignore button to continue.

Screen Shot 2013-04-05 at 8.34.17 PM

8. In the Destination Virtual Machine window, a listing of the current VMs on the ESXi server should appear. Name the VM that’s being imported as desired and hit the Next button.

Screen Shot 2013-04-05 at 8.34.30 PM

9. In the Destination Location window, select the datastore on the ESXi server that the VM will be imported to and hit the Next button.

Screen Shot 2013-04-05 at 8.34.38 PM

10. In the Options window, leave the default settings alone and hit the Next button.

Screen Shot 2013-04-05 at 8.34.52 PM

11. In the Summary window, hit the Finish button.

Screen Shot 2013-04-05 at 8.35.23 PM

Once all the conversion choices have been made, the VM will then be uploaded to the ESXi server. It’s important to know that the OS X VM will upload in an unbootable state.

Screen Shot 2013-04-05 at 9.18.46 PM

Screen Shot 2013-04-05 at 9.53.53 PM

At this point, you will need the VMware vSphere Client application to do the rest of the work on the ESXi server.

13. Launch VMware vSphere Client and log into the ESXi server.

Screen Shot 2013-04-05 at 9.56.50 PM

14. If the ESXi server is using a self-signed SSL certificate, a warning will appear. Click the Ignore button to continue.

Screen Shot 2013-04-05 at 9.56.57 PM

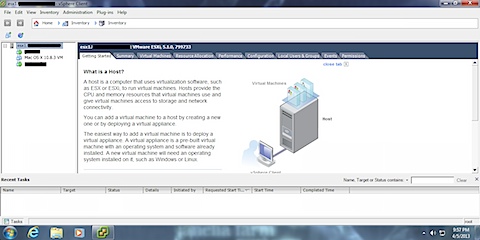
15. The ESXi administration console should appear, with the uploaded VM appearing as a powered-off VM.

Screen Shot 2013-04-05 at 9.57.46 PM

16. Select File: New: Virtual Machine… to create a new VM.

Screen Shot 2013-04-05 at 9.57.56 PM

17. In the Configuration window, select Custom. This option is needed because we want to re-use a part of the uploaded VM.

Screen Shot 2013-04-05 at 9.58.16 PM

18. In the Name and Location window, name the new VM as desired. To avoid problems, name the VM something different from the uploaded VM.

Screen Shot 2013-04-05 at 9.58.27 PM

19. In the Storage window, select the datastore where you want to store the new VM.

Screen Shot 2013-04-05 at 9.58.33 PM

20. In the Virtual Machine Version window, use the default option of Virtual Machine Version: 8.

Screen Shot 2013-04-05 at 9.58.38 PM

21. In the Guest Operating System window, select the following options:

Guest Operating System: Other

Version: Apple Mac OS X 10.7 (64-bit)

Screen Shot 2013-04-05 at 9.58.49 PM

22. In the CPUs window, select the desired number of cores.

Screen Shot 2013-04-05 at 9.58.55 PM

23. In the Memory window, select the desired memory configuration.

Screen Shot 2013-04-05 at 9.59.04 PM

24. In the Network window, select the desired number of network cards.

Screen Shot 2013-04-05 at 9.59.09 PM

25. In the SCSI Controller window, leave it at the default selected SCSI controller.

Screen Shot 2013-04-05 at 9.59.17 PM

26. In the Select a Disk window, choose the Use an existing virtual disk option.

Screen Shot 2013-04-05 at 9.59.26 PM

27. Select the datastore where you had previously uploaded the OS X VM to from the Standalone Converter application and hit the Open button.

Screen Shot 2013-04-05 at 9.59.57 PM

28. Select the folder that corresponds to the name of the uploaded OS X VM and hit the Open button.

Screen Shot 2013-04-05 at 10.00.07 PM

29. Select the .vmdk file inside the uploaded VM and hit the OK button.

Screen Shot 2013-04-05 at 10.00.15 PM

30. Verify that the correct path is showing in the Disk File Path line and hit the Next button.

Screen Shot 2013-04-05 at 10.00.20 PM

31. In the Advanced Options window, leave the settings at the default configuration.

Screen Shot 2013-04-05 at 10.00.25 PM

32. In the Ready to Complete window, verify everything looks OK and hit the Finish button.

Screen Shot 2013-04-05 at 10.00.33 PM

The new VM should now listed. At this point, the uploaded VM can now be removed.

33. Select the uploaded VM and select Remove under the Edit menu.

Screen Shot 2013-04-05 at 10.08.31 PM

34. When asked to confirm the removal, hit the Yes button.

Screen Shot 2013-04-05 at 10.08.36 PM

With the uploaded VM removed, the new VM can be booted to verify that it is working correctly.

Screen Shot 2013-04-05 at 10.08.57 PM

Screen Shot 2013-04-05 at 10.12.39 PM


Running Java 7 in a VMware Fusion 10.8.x VM

$
0
0

As mentioned previously, I’ve moved the majority of my testing to OS X VMs running in either VMware Fusion or VMware ESXi. However, there has been one component of my build testing that I still needed actual Macs for: testing Oracle’s Java 7 updates. The reason for this is that Java 7 crashes when run inside of a VMWare Fusion VM.

Oracle has certified the following virtualization solutions as being Oracle JDK 7 and JRE 7 Certified System Configurations:

Certified:

Oracle VM 2.2

VirtualBox 3.x – 4.x

Solaris Containers

Solaris LDOMs

Not certified:

VMware virtualization solutions

Microsoft virtualization solutions

Unfortunately, that meant unless Oracle or VMware stepped up, Java 7 wasn’t going to run inside an OS X VM. Fortunately, VMware stepped up. There is now a script available from VMware to patch liblwawt.dylib in the Java 7 Runtime Environment. The patch addresses the Java 7 crashing issue, allowing Java 7 Update 17 to run normally in an OS X 10.8.3 VM.

The patch is specific to 10.8.x VMs and does not work in 10.7.x VMs at this time.

I’ve posted a copy of the Python script that applies the patch here on my GitHub repo:

https://github.com/rtrouton/rtrouton_scripts/tree/master/rtrouton_scripts/vmware_fusion_java_7_patch

I’ve also built a payload-free package to run the script:

https://github.com/rtrouton/rtrouton_scripts/tree/master/rtrouton_scripts/vmware_fusion_java_7_patch/payload-free_package


Migrating OS X VMs files without VMware Standalone Converter

$
0
0

In one of the comments to my earlier post about migrating OS X VMs to ESXi, Alan Gordon mentioned another way to convert an OS X VM’s vmdk file to an ESXi-compatible format.

Since the process I developed is ultimately about getting the OS X VM’s vmdm file up to the ESXi server, then building a new VM on the ESXi server to use that vmdk file, this is an easier technique because it allows us to skip using VMware Standalone Converter altogether. Instead, this procedure will use the vmware-vdiskmanager tool included with VMware Fusion and the VMware vSphere Client application. See below the jump for details.

Converting the OS X VM’s vmdk file

1. Open Terminal

2. Run the following command, inserting the correct VMWare Fusion vmdk file source and new vmdk destination:


/Applications/VMware\ Fusion.app/Contents/Library/vmware-vdiskmanager -r /path/to/vmware_fusion.vmwarevm/vmware_fusion.vmdk -t 4 /path/to/esxi.vmdk

Screen Shot 2013-04-15 at 2.40.07 PM

Screen Shot 2013-04-15 at 2.43.48 PM

3. Once the conversion process has completed, you will see that the conversion process has created two files:

filename.vmdk

filename-flat.vmdk

This is normal and ESXi will need both of these files.

Screen Shot 2013-04-15 at 2.44.35 PM

4. Store both files somewhere where you can access them from Windows with the VMware vSphere Client application.

5. Quit out of Terminal.

Using VMware vSphere Client to create a new VM and upload the converted vmdk files

1. Launch VMware vSphere Client and log into the ESXi server.

Screen Shot 2013-04-05 at 9.56.50 PM

2. If the ESXi server is using a self-signed SSL certificate, a warning will appear. Click the Ignore button to continue.

Screen Shot 2013-04-05 at 9.56.57 PM

3. The ESXi administration console should appear.

Screen Shot 2013-04-05 at 9.57.46 PM

4. Select File: New: Virtual Machine… to create a new VM.

Screen Shot 2013-04-05 at 9.57.56 PM

5. In the Configuration window, select Custom. This option is needed because we need to set this VM to initially have no disk associated with it.

Screen Shot 2013-04-15 at 10.17.32 AM

6. In the Name and Location window, name the new VM as desired. In this case, I’m naming it troutont-vm2.

Screen Shot 2013-04-15 at 10.16.47 AM

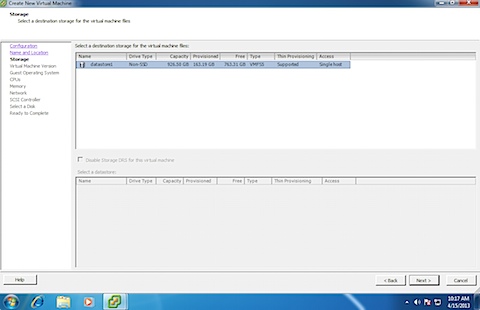
7. In the Storage window, select the datastore where you want to store the new VM.

Screen Shot 2013-04-15 at 10.17.46 AM

8. In the Virtual Machine Version window, use the default option of Virtual Machine Version: 8.

Screen Shot 2013-04-15 at 10.17.50 AM

9. In the Guest Operating System window, select the following options:

Guest Operating System: Other

Version: Apple Mac OS X 10.7 (64-bit)

Screen Shot 2013-04-15 at 10.17.57 AM

10. In the CPUs window, select the desired number of cores.

Screen Shot 2013-04-15 at 10.18.01 AM

11. In the Memory window, select the desired memory configuration.

Screen Shot 2013-04-15 at 10.18.08 AM

12. In the Network window, select the desired number of network cards.

Screen Shot 2013-04-15 at 10.18.13 AM

13. In the SCSI Controller window, leave it at the default selected SCSI controller.

Screen Shot 2013-04-15 at 10.18.17 AM

14. In the Select a Disk window, choose the Do not create disk option.

Screen Shot 2013-04-15 at 10.18.23 AM

15. In the Ready to Complete window, verify everything looks OK and hit the Finish button.

Screen Shot 2013-04-15 at 4.31.46 PM

The new VM should now be listed. The next step is now to upload the converted vmdk files and associate them with the VM.

Screen Shot 2013-04-15 at 11.21.11 AM

16. In your ESXi server settings, select the Configuration tab then click on Storage.

Screen Shot 2013-04-15 at 4.43.50 PM

17. In Storage, select your datastore and right-click to select Browse Datastore…

Screen Shot 2013-04-15 at 4.44.02 PM

18. In the list of folders that appears, select the folder name that corresponds to the newly-created VM.

Screen Shot 2013-04-15 at 11.20.12 AM

19. Select the Upload button (highlighted in red below.)

Screen Shot 2013-04-15 at 11.20.12 AM

20. Select the filename.vmdk and filename-flat.vmdk files and upload them individually.

Screen Shot 2013-04-15 at 4.46.01 PM

21. Click the Yes button at the Upload/Download Operation Warning window.

Screen Shot 2013-04-15 at 4.46.37 PM

The files will then upload.

Screen Shot 2013-04-15 at 11.05.32 AM

Once both files are uploaded, you should see only the filename.vmdk file showing in the Datastore Browser window.

Screen Shot 2013-04-15 at 4.46.57 PM

Configuring the VM to use the uploaded vmdk

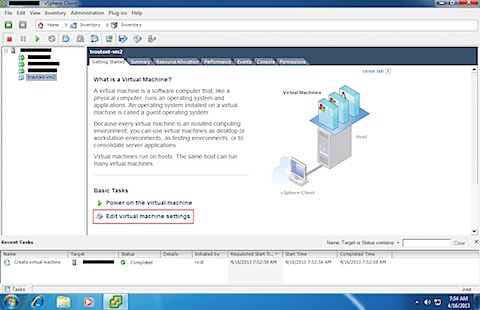
22. Click on the VM and select Edit virtual machine settings under the Get Started tab.

Screen Shot 2013-04-16 at 7.54.27 AM

23. Click the Add… button in the Virtual Machine Properties window.

Screen Shot 2013-04-15 at 11.19.40 AM

24. For Device Type, select Hard Disk

Screen Shot 2013-04-15 at 11.19.52 AM

25. In the Select a Disk window, choose the Use an existing virtual disk option.

Screen Shot 2013-04-15 at 11.19.58 AM

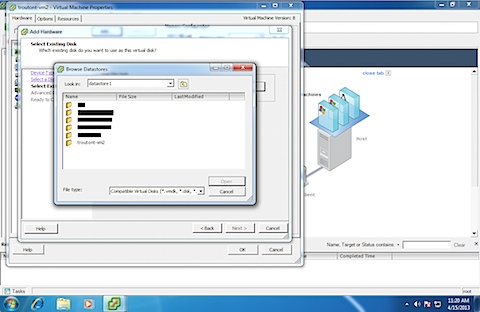
26. Select the datastore with the newly-created VM and hit the Open button.

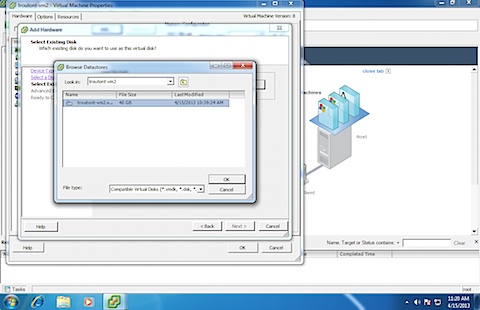
Screen Shot 2013-04-15 at 11.20.08 AM

27. Select the uploaded .vmdk file inside the VM and hit the OK button.

Screen Shot 2013-04-15 at 11.20.31 AM

28. In the Advanced Options window, leave the settings at the default configuration.

Screen Shot 2013-04-15 at 11.20.41 AM

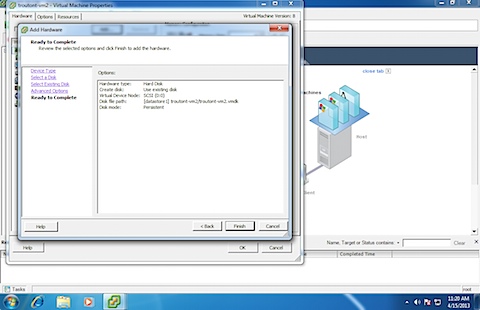
29. In the Ready to Complete window, verify everything looks OK and hit the Finish button.

Screen Shot 2013-04-15 at 11.20.45 AM

30. The new hard disk should now be listed. Hit the OK button to close the Virtual Machine Properties window.

Screen Shot 2013-04-15 at 11.20.51 AM

With the uploaded VM removed, the new VM can be booted to verify that it is working correctly.

Screen Shot 2013-04-15 at 11.21.28 AM

Screen Shot 2013-04-15 at 11.30.11 AM


Managing Safari’s Java whitelist

$
0
0

Safari 6.0.4 and later (for Mac OS X 10.7.x and 10.8.x), and 5.1.9 and later (for Mac OS X 10.6.x) now prompts you to enable the Java browser plug-in on a website-by-website basis. When a Java applet is allowed, it is added to a whitelist in Safari’s Security settings.

This was going to be an issue at my workplace, as we have a couple of applications that rely on Java applets running through the browser. To help fix this and manage the Safari Java whitelist, I’ve written a couple of scripts. These scripts are designed to add websites to Safari’s Java whitelist without overwriting existing entries. For more details, see below the jump.

safari_java_whitelist_firstboot – This script is designed to be a firstboot script. It sets the Safari Java whitelist settings in your Mac’s default user template and for all existing users. Currently, it will add two servers to the Safari Java whitelist settings.


#!/bin/sh

# Adding two websites to Safari's Java whitelist in your Mac's default user template and for all existing users.
# Code adapted from DeployStudio's rc130 ds_finalize script, from the section where DeployStudio is disabling the iCloud and gestures demos

# Determine OS version
osvers=$(sw_vers -productVersion | awk -F. '{print $2}')

# Get today's date

TODAY=$(date "+%FT%TZ")

# Get Java plug-in info
JAVA_PLUGIN=`/usr/bin/defaults read "/Library/Internet Plug-Ins/JavaAppletPlugin.plugin/Contents/Info" CFBundleIdentifier`

# Checks first to see if the Mac is running 10.6 or higher. 
# If so, the script checks the system default user template
# for the presence of the Library/Preferences directory.
#
# If the directory is not found, it is created and then the
# Java whitelist settings are created.

if [[ ${osvers} -ge 6 ]];
then
  for USER_TEMPLATE in "/System/Library/User Template"/*
  do
     if [ ! -d "${USER_TEMPLATE}"/Library/Preferences ]
      then
        /bin/mkdir -p "${USER_TEMPLATE}"/Library/Preferences
     fi
     if [ -d "${USER_TEMPLATE}"/Library/Preferences ]
      then

         # Add Server1 to Java whitelist

         /usr/bin/defaults write "${USER_TEMPLATE}"/Library/Preferences/com.apple.Safari "WhitelistedBlockedPlugins" -array-add '{"PluginHostname" = "server1.name.here"; "PluginIdentifier" = "'$JAVA_PLUGIN'"; "PluginLastVisitedDate" = "'$TODAY'"; "PluginName" = "Java Applet Plug-in"; "PluginPageURL" = "https://server1.name.here"; "PluginPolicy" = "PluginPolicyNeverBlock";}'

         # Add Server2 to Java whitelist

         /usr/bin/defaults write "${USER_TEMPLATE}"/Library/Preferences/com.apple.Safari "WhitelistedBlockedPlugins" -array-add '{"PluginHostname" = "server2.name.here"; "PluginIdentifier" = "'$JAVA_PLUGIN'"; "PluginLastVisitedDate" = "'$TODAY'"; "PluginName" = "Java Applet Plug-in"; "PluginPageURL" = "https://server2.name.here"; "PluginPolicy" = "PluginPolicyNeverBlock";}'
        
     fi
  done
fi


# Checks first to see if the Mac is running 10.6 or higher.
# If so, the script checks the existing user folders in /Users
# for the presence of the Library/Preferences directory.
#
# If the directory is not found, it is created and then the
# Java whitelist settings are created.

if [[ ${osvers} -ge 6 ]];
then
  for USER_HOME in /Users/*
  do
    USER_UID=`basename "${USER_HOME}"`
    if [ ! "${USER_UID}" = "Shared" ] 
    then 
      if [ ! -f "${USER_HOME}"/Library/Preferences ]
      then
        /bin/mkdir -p "${USER_HOME}"/Library/Preferences
        chown "${USER_UID}" "${USER_HOME}"/Library
        chown "${USER_UID}" "${USER_HOME}"/Library/Preferences
      fi
      if [ -d "${USER_HOME}"/Library/Preferences ]
      then

         # Add Server1 to Java whitelist

         /usr/bin/defaults write "${USER_HOME}"/Library/Preferences/com.apple.Safari "WhitelistedBlockedPlugins" -array-add '{"PluginHostname" = "server1.name.here"; "PluginIdentifier" = "'$JAVA_PLUGIN'"; "PluginLastVisitedDate" = "'$TODAY'"; "PluginName" = "Java Applet Plug-in"; "PluginPageURL" = "https://server1.name.here"; "PluginPolicy" = "PluginPolicyNeverBlock";}'

         # Add Server2 to Java whitelist

         /usr/bin/defaults write "${USER_HOME}"/Library/Preferences/com.apple.Safari "WhitelistedBlockedPlugins" -array-add '{"PluginHostname" = "server2.name.here"; "PluginIdentifier" = "'$JAVA_PLUGIN'"; "PluginLastVisitedDate" = "'$TODAY'"; "PluginName" = "Java Applet Plug-in"; "PluginPageURL" = "https://server2.name.here"; "PluginPolicy" = "PluginPolicyNeverBlock";}'

        # Fix permissions on com.apple.Safari.plist

         /usr/sbin/chown "${USER_UID}" "${USER_HOME}"/Library/Preferences/com.apple.Safari.*

      fi
    fi
  done
fi

# Remove setup LaunchDaemon item

srm /Library/LaunchDaemons/com.company.safari_java_whitelist_firstboot.plist

# Make script self-destruct

srm $0

safari_set_java_whitelist_at_login – The script will add two servers to the Safari Java whitelist settings. If the servers are already in the whitelist, it will note that in the log, then exit.

To make this work, I’ve written a script and launch agent combination. The LaunchAgent runs the script on login to any user account with the logging-in user’s privileges and permissions.


#!/bin/sh

# Get today's date
TODAY=$(/bin/date "+%FT%TZ")

# Determine OS version
osvers=$(sw_vers -productVersion | awk -F. '{print $2}')

# Get Java plug-in info
JAVA_PLUGIN=`/usr/bin/defaults read "/Library/Internet Plug-Ins/JavaAppletPlugin.plugin/Contents/Info" CFBundleIdentifier`

# Check com.apple.Safari.plist for Server1 address
SERVER1_WHITELIST_CHECK=`/usr/bin/defaults read $HOME/Library/Preferences/com.apple.Safari WhitelistedBlockedPlugins | grep PluginHostname | awk '{print $3, $4}' | grep server1.name.here | tr -d '";'`

# Check com.apple.Safari.plist for Server2 address
SERVER2_WHITELIST_CHECK=`/usr/bin/defaults read $HOME/Library/Preferences/com.apple.Safari WhitelistedBlockedPlugins | grep PluginHostname | awk '{print $3, $4}' | grep server2.name.here | tr -d '";'`

if [[ ${osvers} -ge 6 ]]; then
  if [[ -n ${SERVER1_WHITELIST_CHECK} ]]; then

        # Server1 settings are present
	    /usr/bin/logger "${SERVER1_WHITELIST_CHECK} is part of the Java whitelist in Safari. Nothing to do here."
    else	    
		# Add Server1 to Java whitelist
        /usr/bin/defaults write $HOME/Library/Preferences/com.apple.Safari "WhitelistedBlockedPlugins" -array-add '{"PluginHostname" = "server1.name.here"; "PluginIdentifier" = "'$JAVA_PLUGIN'"; "PluginLastVisitedDate" = "'$TODAY'"; "PluginName" = "Java Applet Plug-in"; "PluginPageURL" = "https://server1.name.here"; "PluginPolicy" = "PluginPolicyNeverBlock";}'
        /usr/bin/logger "server1.name.here has been added to the Java whitelist in Safari."
  fi

  if [[ -n ${SERVER2_WHITELIST_CHECK} ]]; then

		# Server2 settings are present
		/usr/bin/logger "${SERVER2_WHITELIST_CHECK} is part of the Java whitelist in Safari. Nothing to do here."
     else		
        # Add Server2 to Java whitelist
		/usr/bin/defaults write $HOME/Library/Preferences/com.apple.Safari "WhitelistedBlockedPlugins" -array-add '{"PluginHostname" = "server2.name.here"; "PluginIdentifier" = "'$JAVA_PLUGIN'"; "PluginLastVisitedDate" = "'$TODAY'"; "PluginName" = "Java Applet Plug-in"; "PluginPageURL" = "https://server2.name.here"; "PluginPolicy" = "PluginPolicyNeverBlock";}'
        /usr/bin/logger "server2.name.here has been added to the Java whitelist in Safari."
  fi

fi

exit 0

Of the two approaches, I recommend using the safari_set_java_whitelist_at_login script and LaunchAgent. The reason is that the script will then run for all users (both current and future) and the script itself can be updated as needed to add or remove items.

Both scripts are available here on my GitHub repo:

https://github.com/rtrouton/rtrouton_scripts/tree/master/rtrouton_scripts/safari_java_whitelist

Credit goes to @aurica for figuring out the needed defaults commands.


Booting into single-user mode on a FileVault 2-encrypted Mac

$
0
0

I recently communicated with a Mac admin who was concerned about using FileVault 2 in his environment because he didn’t want to lose access to tools like single-user mode. Like a number of Mac admins, he’d found single-user mode valuable in helping to diagnose and fix issues on troublesome Macs.

Fortunately, Apple makes it reasonably easy to boot into single-user mode on a FileVault 2-encrypted system. Here’s how to boot into single-user on a FileVault 2-encrypted system:

1. Hold down Command-S after powering the system.

2. The Mac will be begin booting into single user, then the FileVault 2 pre-boot login screen will appear.

3. Authenticate at the FileVault 2 pre-boot login screen by selecting an account and providing the account’s password.

4. The Mac will then unlock and continue booting into single-user mode.

To show what this looks like, I’ve made a short video showing the process. In this instance, I booted into single-user mode and performed a disk check using fsck, then continued with the rest of the boot process.


FileVault Setup.app – local FileVault 2 encryption setup and enforcement

$
0
0

I was recently asked to help test a new utility called FileVault Setup for setting up and enforcing FileVault 2 encryption. It’s designed to be a user-friendly interface for Apple’s fdesetup tool on OS X 10.8.x which supports turning on FileVault 2 encryption and enabling a single user account.

One nice thing about this tool from my perspective is that it’s designed to be independent of any server-based resources. To the best of my knowledge, this is the first tool I’ve seen that allows FileVault encryption to be enforced on a machine entirely from the machine’s own resources. See below the jump for the details.

Building

You can build the latest version of the application using the Xcode project files available from the GitHub repository. There’s also a already-built application available for download from the GitHub repo.

Installation

This application can be installed anywhere on the Mac, though the GitHub project page recommends either /Applications or /Applications/Utilities. For the purposes of my testing, I put it into /Applications.

Screen Shot 2013-04-29 at 9.58.54 AM

If you want to hide the application from your users, I’d recommend putting it into a location like /var/root.

Operation

The application was designed to be run by a Mac OS X loginhook. This allows it to be launched when a user logs in, but also runs the application with root privileges. Running this application with root privileges is important because fdesetup requires root privileges to run.

Since this is a process that’s more easily shown than explained, I’ve made a video showing the process from the user’s perspective.

Note: The video has been edited to artificially reduce the amount of time it took to encrypt. Run time of the pre-edited video was 9 minutes.

Management

The application has four command line switches that can be used to tell it how to run:

-FVSDoNotAskForSetup YES / NO – suppresses prompting the user to enable FileVault 2 encryption. The default is NO

-FVSForceSetup YES / NO – Sets the FileVault 2 encryption to use /Library/Keychains/FileVaultMaster.keychain as an institutional recovery key. The default is NO

-FVSUseKeychain YES / NO – Sets the FileVault 2 encryption to use /Library/Keychains/FileVaultMaster.keychain as an institutional recovery key. The default is YES

-FVSCreateRecoveryKey YES / NO – Sets the FileVault 2 encryption to generate and use an alphanumeric individual recovery key. The default is YES

FileVault Setup can also be managed by MCX or by the defaults command. FileVault Setup accepts four defaults:


FVSDoNotAskForSetup: suppresses prompting the user to enable FileVault 2 encryption, default is NO / FALSE

FVSForceSetup: Sets the FileVault 2 encryption to use /Library/Keychains/FileVaultMaster.keychain as an institutional recovery key, default is NO / FALSE

FVSUseKeychain: Sets the FileVault 2 encryption to use /Library/Keychains/FileVaultMaster.keychain as an institutional recovery key, default is YES / TRUE

FVSCreateRecoveryKey: Sets the FileVault 2 encryption to generate and use an alphanumeric individual recovery key, default is YES / TRUE

The settings are stored in the following domain: ca.sfu.its.filevaultsetup

Running FileVault Setup without any command line switches or other management will mean it will run with the following configuration:

/path/to/FileVault\ Setup.app/Contents/MacOS/FileVault\ Setup -FVSDoNotAskForSetup NO -FVSForceSetup NO -FVSUseKeychain YES -FVSCreateRecoveryKey YES

In this case, FileVault 2 encryption set up is not forced. For the recovery keys, FileVault Setup will have fdesetup both generate an alphanumeric individual recovery key and set /Library/Keychains/FileVaultMaster.keychain as an institutional recovery key.

Recovery Keys

As mentioned above, in its default configuration FileVault Setup will try to set up two recovery keys by using a properly configured /Library/Keychains/FileVaultMaster.keychain as the institutional recovery key and also generate an alphanumeric individual recovery key.

To make sure that the individual recovery key is recorded for later reference, FileVault Setup will generate a plist file containing the individual recovery key and store it in the following location:

/private/var/root/fdesetup_output.plist

The plist itself will look similar to this:


<?xml version="1.0" encoding="UTF-8"?>
<!DOCTYPE plist PUBLIC "-//Apple//DTD PLIST 1.0//EN" "http://www.apple.com/DTDs/PropertyList-1.0.dtd">
<plist version="1.0">
<dict>
	<key>EnabledDate</key>
	<string>2013-04-29 22:17:00 -0400</string>
	<key>HardwareUUID</key>
	<string>00000000-0000-1000-8000-000C29CEF923</string>
	<key>HasMasterKeychain</key>
	<true/>
	<key>LVGUUID</key>
	<string>9807169C-24E6-4DDC-975A-71D078D73390</string>
	<key>LVUUID</key>
	<string>2BF1F4CA-5E97-4A6B-820A-A87F1DEA5B1D</string>
	<key>PVUUID</key>
	<string>0B0DE25B-8D24-4E31-B1B0-0831455C3A65</string>
	<key>RecoveryKey</key>
	<string>QFDA-9W5V-K2W3-93MR-Y7T8-DPZ5</string>
	<key>SerialNumber</key>
	<string>VMWVk2F+NYrG/tkLIignnJaiw</string>
</dict>
</plist>

If you want to use only the institutional recovery key, you would need to ensure that there is a properly configured FileVaultMaster.keychain stored in /Library/Keychains, then use FVSUseKeychain YES and FVSCreateRecoveryKey NO:

Example command:

/path/to/FileVault\ Setup.app/Contents/MacOS/FileVault\ Setup -FVSUseKeychain YES -FVSCreateRecoveryKey NO

If you want to use only the individual recovery key, you would need to ensure that there is not a FileVaultMaster.keychain stored in /Library/Keychains, then use FVSUseKeychain NO and FVSCreateRecoveryKey YES.

Example command:

/path/to/FileVault\ Setup.app/Contents/MacOS/FileVault\ Setup -FVSUseKeychain NO -FVSCreateRecoveryKey YES

Testing FileVault Setup

My testing was focused on forcing FileVault 2 encryption and using the command-line switches to tell FileVault Setup what to do. As part of that, I set up the following loginhook:


#!/bin/sh

FVSETUP=/path/to/FileVault\ Setup.app/Contents/MacOS/FileVault\ Setup
DISKUTIL="/usr/sbin/diskutil"
LOGGER="/usr/bin/logger"


# check_encryption_state taken
# from the Cauliflower Vest wiki's
# loginhook script:
# http://code.google.com/p/cauliflowervest/wiki/LoginHook

check_encryption_state() {
  ${DISKUTIL} cs list | grep -q -e 'Conversion\ Status.*Pending'
  if [[ ${?} -eq 0 ]]; then
    ${LOGGER} "Disk encryption pending, skipping."
    exit 0
  fi

  ${DISKUTIL} cs list | grep -q -e 'Conversion\ Status.*Complete'
  if [[ ${?} -eq 0 ]]; then
    ${LOGGER} "Disk encryption complete, skipping."
    exit 0
  fi

  ${DISKUTIL} cs list | grep -q -e 'Conversion\ Status.*Converting'
  if [[ ${?} -eq 0 ]]; then
    ${LOGGER} "Disk encrypting or decrypting, skipping."
    exit 0
  fi
}


# If the FileVault Setup binary is present,
# proceed with encryption. If not, exit the
# script.

if [[ ! -f "$FVSETUP" ]]; then
 ${LOGGER} "FileVault Setup not installed on Mac in specified location"
 exit 0
fi

if [[ -f "$FVSETUP" ]]; then
 ${LOGGER} "FileVault Setup present on Mac"

# Check to see if the Mac is encrypted
# or already encrypting. The application
# also checks for this, but I added this
# to help speed up the loginhook script's
# end if needed

 check_encryption_state
 
   # Replace YOUR_LOCAL_ADMIN_ACCOUNT with 
   # an account that you want to be able
   # to login to the Mac without triggering
   # the encryption to run.

  if [[ $1 == "root" || $1 == "YOUR_LOCAL_ADMIN_ACCOUNT" ]]; then
   ${LOGGER} "Exiting encryption setup for user account: $1"
   exit 0
   else

    # If the Mac isn't encrypted, run FileVault Setup

    "${FVSETUP}" -FVSForceSetup YES -FVSOptionsHere
    ${LOGGER} "Enabling encryption on this Mac."    
  fi
 else
  exit 0
fi

While I used this login hook for my testing, I also tried a much simpler loginscript:


#!/bin/sh

/path/to/FileVault\ Setup.app/Contents/MacOS/FileVault\ Setup -FVSForceSetup YES

I was able to replicate my earlier encryption results, but the pause at the loginwindow (for the loginhook script to run) was a few seconds longer.

From my testing, here’s the commands that will worked along the ones that will generate errors. The errors will be coming from fdesetup or CoreStorage and are the result of FileVault Setup being asked to initialize an unsupported FileVault 2 configuration:

Successful FileVault 2 enablement

With no recovery keychain in /Library/Keychains, FileVault Setup forced FileVault 2 enablement and generated an individual recovery key as the Mac’s only recovery key with the following command:

/path/to/FileVault\ Setup.app/Contents/MacOS/FileVault\ Setup -FVSForceSetup YES -FVSUseKeychain NO -FVSCreateRecoveryKey YES

With FileVaultMaster.keychain stored in /Library/Keychains, FileVault Setup forced FileVault 2 enablement and set the FileVaultMaster.keychain as the Mac’s only recovery key with the following command:

/path/to/FileVault\ Setup.app/Contents/MacOS/FileVault\ Setup -FVSForceSetup YES -FVSUseKeychain YES -FVSCreateRecoveryKey NO

With FileVaultMaster.keychain stored in /Library/Keychains, FileVault Setup forced FileVault 2 enablement and set both the FileVaultMaster.keychain and an individual recovery key with the following command:

/path/to/FileVault\ Setup.app/Contents/MacOS/FileVault\ Setup -FVSForceSetup YES

With FileVaultMaster.keychain stored in /Library/Keychains, FileVault Setup forced FileVault 2 enablement and set the FileVaultMaster.keychain as the Mac’s only recovery key with the following command:

/path/to/FileVault\ Setup.app/Contents/MacOS/FileVault\ Setup -FVSForceSetup YES -FVSCreateRecoveryKey NO

Unsuccessful FileVault 2 enablement

With FileVaultMaster.keychain stored in /Library/Keychains, FileVault Setup gave a fdesetup error 18 with the following command:

/path/to/FileVault\ Setup.app/Contents/MacOS/FileVault\ Setup -FVSForceSetup YES -FVSUseKeychain NO

error_18

With no recovery keychain on the Mac, FileVault Setup gave a fdesetup error 19 with the following command:

/path/to/FileVault\ Setup.app/Contents/MacOS/FileVault\ Setup -FVSForceSetup YES -FVSUseKeychain YES -FVSCreateRecoveryKey NO

With no recovery keychain on the Mac, FileVault Setup gave a fdesetup error 19 with the following command:

/path/to/FileVault\ Setup.app/Contents/MacOS/FileVault\ Setup -FVSForceSetup YES -FVSCreateRecoveryKey YES

With no recovery keychain on the Mac, FileVault Setup gave a fdesetup error 19 with the following command:

/path/to/FileVault\ Setup.app/Contents/MacOS/FileVault\ Setup -FVSForceSetup YES

error_19

With no recovery keychain on the Mac, FileVault Setup gave an error 15 with the following command:

/path/to/FileVault\ Setup.app/Contents/MacOS/FileVault\ Setup -FVSForceSetup YES -FVSUseKeychain NO -FVSCreateRecoveryKey NO

This last error is because FileVault Setup was being asked to set up FileVault 2 encryption without a recovery key. This does not work; you must have a recovery key when encrypting a Mac with FileVault 2.

error_15

Running FileVault Setup on an already-encrypted Mac

One of the nicer features of this application is that it can detect if the Mac has already been encrypted with FileVault 2. If it’s launched on a Mac that’s encrypted, it displays a message that FileVault 2 has already been enabled. Once you click the OK button to acknowledge the message, FileVault Setup then quits.

Screen Shot 2013-04-29 at 3.29.43 PM

At the login window, FileVault Setup will not appear when triggered by the loginhook on an already-encrypted Mac. Instead, the app will silently quit in the background.

Conclusion

If you’re looking for a way to enforce FileVault 2 on your Macs and don’t have access to server resources, FileVault Setup is a great addition to your set of tools. It will give you the ability to encourage encryption on your machines or force it, depending on your security needs.

It also gives you the ability to prepare a machine and deploy it to your users without encrypting it first, as the loginhook will ensure that encryption gets turned on at the first login.


ASR’s hidden documentation

$
0
0

As part of trying to trace down a separate mystery, the folks in the ##osx-server IRC room made an interesting discovery: Apple’s asr tool has hidden documentation.

Normally, to access Apple’s documentation on a command-line tool, you would use man toolname_here or toolname_here help. asr has both of those, but it also has a separate command that reveals additional asr options not mentioned in the regular man or help pages.

With asr help, you get the following output:

Usage: asr  
   is one of the following:
    asr help | version
    asr restore --source  --target  []
    asr restore --source asr:/// --file  []
    asr server  --source  --config  []
    asr imagescan --source  [--filechecksum] [--nostream] [--SHA1]
   is in bytes but may end with a scale factor (b, k, m, g)

common  are any of:
      --source  path or url to disk image file, mountpoint, or
                        web accessible disk image
      --puppetstrings   print out messages in format good for machine parsing
      --verbose         display verbose output
      --debug           display debug output

restore  are any of:
      --target  path to volume or mountpoint
      --erase           formats target volume
      --format  target format when erasing (defaults to source)
      --noprompt        don't require confirmation on erase
      --noverify        don't checksum results
      --buffers    number of buffers to use in block copy
      --buffersize   size of buffers to use in block copy
      --csumbuffers   number of buffers for the checksum if different
      --csumbuffersize  size of buffers for the checksum if different
      --timeout      max wait for stream in multicast client mode

server  are any of:
      --interface  Use 'if' as the interface for the server's
                       outgoing stream
      --config  server configuration file in plist format

imagescan  are any of:
      --filechecksum calculate file checksum
      --nostream     don't reorder file for multicast streaming
      --SHA1         add a SHA-1 checksum to the image

Screen Shot 2013-04-30 at 3.52.21 PM

However, when you run FULL_USAGE=1 asr help, you get the following output:

Usage: asr  
   is one of the following:
    asr help | version
    asr restore --source  --target  []
    asr restore --source asr:/// --file  []
    asr server  --source  --config  []
    asr imagescan --source  [--filechecksum] [--nostream] [--SHA1]
    asr partition --target  [--testsize ]
                           [--retestsize ] [--recoverysize ]
    asr freeze --target  [--testsize ]
                        [--retestsize ] [--recoverysize ]
    asr thaw --target  [--recovery] [--modifyrecovery]
    asr adjust --target  [--settype ]
   is in bytes but may end with a scale factor (b, k, m, g)

common  are any of:
      --source  path or url to disk image file, mountpoint, or
                        web accessible disk image
      --puppetstrings   print out messages in format good for machine parsing
      --verbose         display verbose output
      --debug           display debug output

restore  are any of:
      --target  path to volume or mountpoint
      --hidden          restore to the hidden customer software partition
      --erase           formats target volume
      --format  target format when erasing (defaults to source)
      --noprompt        don't require confirmation on erase
      --noverify        don't checksum results
      --buffers    number of buffers to use in block copy
      --buffersize   size of buffers to use in block copy
      --csumbuffers   number of buffers for the checksum if different
      --csumbuffersize  size of buffers for the checksum if different
      --timeout      max wait for stream in multicast client mode

server  are any of:
      --interface  Use 'if' as the interface for the server's
                       outgoing stream
      --config  server configuration file in plist format

imagescan  are any of:
      --filechecksum calculate file checksum
      --nostream     don't reorder file for multicast streaming
      --SHA1         add a SHA-1 checksum to the image

Screen Shot 2013-04-30 at 3.52.44 PM

There are now four additional options listed:

    asr partition --target  [--testsize ]
                           [--retestsize ] [--recoverysize ]
    asr freeze --target  [--testsize ]
                        [--retestsize ] [--recoverysize ]
    asr thaw --target  [--recovery] [--modifyrecovery]
    asr adjust --target  [--settype ]

Screen Shot 2013-04-30 at 3.53.22 PM

The question I don’t know the answer to is “What do these options do?”

I’ve seen asr adjust used to correct an incorrectly set Recovery HD partition, but I’m not familiar with what asr freeze and asr thaw do.

Do you know? Let me know in the comments.


Script to run remote commands via SSH

$
0
0

As a follow-on to my earlier post about running remote commands with SSH, I noticed I was repeatedly running particular commands via SSH on remote machines. I was copying and pasting the bits I needed into Terminal, but it was still a manual process and manual processes should be scripted whenever possible.

geekrepetitivegraph  

Here’s the script I wrote to solve my particular problem.


#!/bin/bash

# At the prompt, enter the IP address
# or DNS name of the machine you want
# to connect to.

echo -n "Enter IP Address or Domain Name: "
read ipaddress

# At the prompt, enter the username
# of the account you want to log in
# with.

echo -n "Enter Username: "
read username

# At the prompt, enter the command that
# you want to run on the remote machine.

echo -n "Enter the command you want to run on the remote machine: "
read command

echo ""
echo ""

# Error checking to verify that the correct
# information has been entered. If incorrect
# info has been entered, selecting No will
# exit the script.

echo "Is the information below correct?"
echo ""
echo "Remote machine: $ipaddress"
echo "Username: $username"
echo "Command: $command"
echo ""
echo "If it is correct, select Yes"
echo ""
select yn in "Yes" "No"; do
    	case $yn in
        	Yes) echo "OK, the script will continue."; break;;
        	No ) echo "To avoid errors, the script will need to be restarted. Exiting the script."; exit 0;;
    	esac
done
echo ""
echo ""

# Check to see if the command needs to be
# run with root privileges. If root privileges
# are needed, the SSH connection will force 
# pseudo-tty allocation, which allows the command
# to be run via sudo

echo "Does this command need to run with root privileges? Once you select Yes or No, the command will run on the remote machine."
echo "Note: You will be prompted if authentication is required. If running the command as root, you may be prompted twice."
echo ""
select yn in "Yes" "No"; do
    	case $yn in
        	Yes) echo ""; ssh -t $username@$ipaddress "sudo $command"; break;;
        	No ) echo ""; ssh $username@$ipaddress "$command"; break;;
    	esac
done

#Exiting the script
echo ""
echo ""
echo "Finished running the remote command"
exit 0

The script is also available on my GitHub repo at the following location:

https://github.com/rtrouton/rtrouton_scripts/tree/master/rtrouton_scripts/running_commands_remotely_with_ssh


FileVault 2 session at Penn State MacAdmins Conference 2013

Changes to XProtect’s Java browser plug-in version management

$
0
0

In last night’s XProtect update, Apple added two new version checks. The first new check looks for Apple’s com.apple.java.JavaAppletPlugin Java browser plug-in identifier. This Apple Java browser plug-in is running on Mac OS X 10.6.x or was installed on 10.7.x or later by Java for OS X 2012-005 or earlier. Installing Java for OS X 2012-006 and later on 10.7.x and 10.8.x automatically removes the Apple Java browser plug-in.

The second new check looks for Apple’s com.apple.java.JavaPlugin2_NPAPI Java browser plug-in identifier. In this case, the Apple Java plug-in was re-enabled using the procedure in the following Apple KBase article: http://support.apple.com/kb/HT5559

This update also removes the Oracle Java browser plug-in version check from 10.6.x’s XProtect. Both new Apple Java version checks and the Oracle Java browser plug-in version check are in the 10.7.x and 10.8.x XProtect. See below the jump for the details.

As of 5-11-2013, /System/Library/CoreServices/CoreTypes.bundle/Contents/Resources/XProtect.meta.plist on 10.6.8 looks like this:

<?xml version="1.0" encoding="UTF-8"?>
<!DOCTYPE plist PUBLIC "-//Apple//DTD PLIST 1.0//EN" "http://www.apple.com/DTDs/PropertyList-1.0.dtd">
<plist version="1.0">
<dict>
	<key>JavaWebComponentVersionMinimum</key>
	<string>1.6.0_45-b06-451</string>
	<key>LastModification</key>
	<string>Fri, 10 May 2013 19:07:37 GMT</string>
	<key>PlugInBlacklist</key>
	<dict>
		<key>10</key>
		<dict>
			<key>com.apple.java.JavaAppletPlugin</key>
			<dict>
				<key>MinimumPlugInBundleVersion</key>
				<string>13.9.5</string>
				<key>PlugInUpdateAvailable</key>
				<true/>
			</dict>
			<key>com.apple.java.JavaPlugin2_NPAPI</key>
			<dict>
				<key>MinimumPlugInBundleVersion</key>
				<string>13.9.5</string>
				<key>PlugInUpdateAvailable</key>
				<true/>
			</dict>
			<key>com.macromedia.Flash Player.plugin</key>
			<dict>
				<key>MinimumPlugInBundleVersion</key>
				<string>11.6.602.171</string>
			</dict>
		</dict>
	</dict>
	<key>Version</key>
	<integer>64</integer>
</dict>
</plist>

As of 5-11-2013, /System/Library/CoreServices/CoreTypes.bundle/Contents/Resources/XProtect.meta.plist on 10.7.5 and 10.8.3 looks like this:

<?xml version="1.0" encoding="UTF-8"?>
<!DOCTYPE plist PUBLIC "-//Apple//DTD PLIST 1.0//EN" "http://www.apple.com/DTDs/PropertyList-1.0.dtd">
<plist version="1.0">
<dict>
	<key>JavaWebComponentVersionMinimum</key>
	<string>1.6.0_45-b06-451</string>
	<key>LastModification</key>
	<string>Fri, 10 May 2013 19:07:37 GMT</string>
	<key>PlugInBlacklist</key>
	<dict>
		<key>10</key>
		<dict>
			<key>com.apple.java.JavaAppletPlugin</key>
			<dict>
				<key>MinimumPlugInBundleVersion</key>
				<string>14.7.0</string>
				<key>PlugInUpdateAvailable</key>
				<true/>
			</dict>
			<key>com.apple.java.JavaPlugin2_NPAPI</key>
			<dict>
				<key>MinimumPlugInBundleVersion</key>
				<string>14.7.0</string>
				<key>PlugInUpdateAvailable</key>
				<true/>
			</dict>
			<key>com.macromedia.Flash Player.plugin</key>
			<dict>
				<key>MinimumPlugInBundleVersion</key>
				<string>11.6.602.171</string>
			</dict>
			<key>com.oracle.java.JavaAppletPlugin</key>
			<dict>
				<key>MinimumPlugInBundleVersion</key>
				<string>1.7.21.12</string>
				<key>PlugInUpdateAvailable</key>
				<true/>
			</dict>
		</dict>
	</dict>
	<key>Version</key>
	<integer>2038</integer>
</dict>
</plist>

To help manage the new settings, I’ve updated my xprotect_re-enable_java_6_and_7.sh script:

The script has been tested on 10.6.8, 10.7.5 and 10.8.3, so it should cover all current OSs that use Apple’s XProtect malware protection.

The script and launchdaemon are available here on my GitHub repo: https://github.com/rtrouton/rtrouton_scripts/tree/master/rtrouton_scripts/xprotect_re-enable_java_6_and_7


First Boot Package Install.pkg

$
0
0

As covered previously, Greg Neagle’s createOSXinstallPkg is a versatile tool for installing or upgrading Mac OS X in a variety of situations. One of the nicer features is that you can edit the OS X installer to install additional packages.

However, the limitations of the OS X install environment mean that there are a number of installers that won’t install correctly. In particular, packages that rely on pre- or postflight scripts to perform important tasks may fail to run properly in the OS X install environment.
To help work around this limitation, I’ve developed First Boot Package Install.pkg, an installer package that enables other packages to be installed at first boot.

Screen Shot 2013-05-12 at 5.45.21 PM

It’s designed for use with createOSXinstallPkg with the goal of allowing installer packages that can’t run in the OS X Install environment to be used as part of a createOSXinstallPkg deployment workflow. See below the jump for the details.

Using First Boot Package Install.pkg’s pre-built installer package

1. Download the First_Boot_Package_Install.zip file from the installer directory in my GitHub repo

2. Once downloaded and unzipped, right-click on the package and choose Show Package Contents.
Screen Shot 2013-05-12 at 5.46.37 PM

3. Go to Contents: Resources: fb_installers

Screen Shot 2013-05-12 at 5.47.22 PM

4. Add one installer package to each numbered directory. The number of the directory indicates the install order, with 00 being the first.

NOTE: createOSXinstallPkg has an upper limit of 350 MBs of available space for added packages. This is sufficient space for basic configuration, payload-free or bootstrapping packages, but it’s not a good idea to add Microsoft Office or similar large installers to this installer.

Screen Shot 2013-05-12 at 5.47.42 PM

Screen Shot 2013-05-12 at 5.48.01 PM

As needed, more numbered directories may be added to the fb_installers directory. For numbers less than 10, make sure to label the directory with a leading zero (For example, 06).

Note: If installing more than 100 packages, be aware that this was beyond the scope of my testing. I recommend adding another leading zero where appropriate.

5. Once finished adding installers to the numbered directories, First Boot Package Install.pkg is ready to be added to a deployment workflow.

What’s supposed to happen

The installer package is designed to install packages in the desired order, then remove all traces. All actions occur before the OS X login window appears.

What the end-user sees

After the OS X install completes, it restarts and stays at the gray Apple loading screen for as long as it takes for the packages to install.

AppleBootScreen

Once the install completes, the Mac automatically restarts and boots up normally to the login window.

How First Boot Package Install.pkg works


When First Boot Package Install.pkg is installed via createOSXinstallPkg, it does the following:

1. Copies First Boot Package Install.pkg/Contents/Resources/fb_installers to /Users/Shared/fb_installers

2. Installs /Library/LaunchDaemons/com.company.firstbootpackageinstall.plist

3. Installs /var/firstbootpackageinstall.sh


After OS X is installed by createOSXinstallPkg and reboots, the following process occurs:

1. The com.company.firstbootpackageinstall LaunchDaemon triggers /var/firstbootpackageinstall.sh to run.

2. /var/firstbootpackageinstall.sh stops the login window from loading and checks for the existence of /Users/Shared/fb_installers.


If /Users/Shared/fb_installers is not found, the following actions take place:

A. The login window is allowed to load

B. /Library/LaunchDaemons/com.company.firstbootpackageinstall.plist is deleted

C. /var/firstbootpackageinstall.sh is deleted


If /Users/Shared/fb_installers is present, the following actions take place:

A. The packages are installed, using the numbered subdirectories to set the order of installation

B. Once installation has finished, /Users/Shared/fb_installers is deleted

C. The Mac is restarted

D. On restart, the “if /Users/Shared/fb_installers is not found” actions occur and all remaining traces of First Boot Package Install.pkg are removed from the Mac.


All First Boot Package Install.pkg components and scripts are available at my GitHub repo:

https://github.com/rtrouton/rtrouton_scripts/tree/master/rtrouton_scripts/first_boot_package_install/

The Iceberg project files are also available via the link above if you want to build a customized First Boot Package Install.pkg for your own environment.


Slides from the FileVault 2 Session at Penn State MacAdmins Conference 2013

Logging into a SMB file server multiple times with different usernames from one Mac

$
0
0

An issue that I’ve run into at my workplace has been people requesting the ability to log into our SMB-using file servers with different usernames. In my specific case, I have a user who wanted to be logged into one of our Windows file servers as username, but also wanted to connect to a specific share on the same server using a different account called other_username.

Normally, this wouldn’t be an issue except this user wanted to log into share A on the server with username and share B on the server with other_username and have both shares mounted at the same time. This is a problem because the Mac’s normal behavior is to keep using the same username / password authentication when connecting to different shares that are hosted on the same server.

To make this issue that much harder to address, our Macs and our file servers are also both bound to the same Active Directory domain, which means that our users normally aren’t being prompted for their usernames and passwords. Instead, they’re using Kerberos to handle logins for the file servers. Kerberos is using the AD account of the logged-in user as part of its authentication process to our servers, so any file share will mount using that account’s access rights.

Fortunately, it does appear that there is a way to make this work. Even better, it doesn’t require breaking Kerberos or trying to get around it. See below the jump for details.

To connect to an SMB file server using a different username, you can use this procedure:

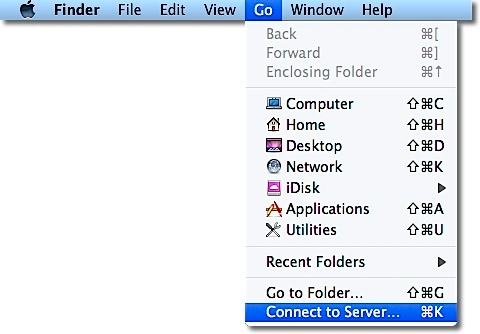
1. In the Finder, choose the Go menu, then select Connect to Server.

connect_to_server

2. Type the network address for the computer or server in the Server Address field in the following format:

smb://other_username:*@server.name.here

Screen Shot 2013-05-31 at 1.33.17 PM

The ” * ” is to trigger the server login window for your SMB server, so that the password for the other_username account can be entered.

3. Click the Connect button.

4. Enter the desired username and password when prompted.

Username: other_username

Password: The current account password for other_username

Screen Shot 2013-05-31 at 1.33.02 PM

5. Select the share on your SMB server that you want to use.

WARNING: Do not try to mount the same share twice using different usernames.

One way you can verify that you’re actually connected using different usernames is to use the mount command in Terminal. This should show all mounted volumes on the Mac, including mounted fileshares. The fileshare mount information should include which account was used to mount the share.

Screen Shot 2013-05-31 at 1.55.39 PM

NOTES:

1. Depending on your file server, this approach may not work consistently. On our Isilon storage, the SMB share would mount with the user-specified username every time. On another server I tested, the server would prefer the specific username that was last used to connect and keep using that username when mounting additional shares.

2. This did not appear to work with AFP fileshares.

Hat tip: kbotnen in the ##osx-server IRC room


Viewing all 764 articles
Browse latest View live