A new feature in VMware Fusion 8 Professional is the ability to create a new VM on an ESXi 6.x server. This new functionality gives Fusion users on OS X another tool for managing VMs on VMware’s ESXi hypervisor and complements the ability to copy VMs between VMware Fusion and VMware ESXi 5.5.x and 6.x.
There are a few things to know about if you want to create an OS X VM to an ESXi server running 6.x, so I’ve put together a procedure for those who want to leverage Fusion 8.x Pro to create new OS X VMs on ESXi. See below the jump for the details.
There are two issues to be aware of when creating VMs on ESXi 6.x using VMware Fusion 8.x:
- As of August 27th 2015, ESXi 6.x supports up to VMware’s Hardware Version 11
- In VMware Fusion 8.0, the new VM’s network interface may not be created correctly
Pre-requisites
- VMware Fusion 8.x Professional
- A fully-updated ESXi 6.x server running on Apple hardware. As of August 27th 2015, the latest version should be ESXi 6.0.0b (ESXi600-201507001).
1. Open VMware Fusion 8 Professional
2. Under the File menu, select New…

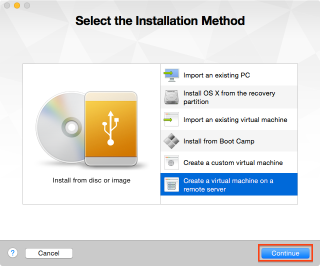
3. The Create a New Virtual Machine window will appear.

4. Select Create a virtual machine on a remote server and click the Continue button.

5. The Choose a Server window will appear.
If you’ve connected to this ESXi server previously
Select the server from the list in the Choose a Server window and click the Continue button.

Enter your credentials when prompted and click on the Connect button

If you have not connected to this ESXi server previously
Click the Connect to another server… button

Enter the server name and your credentials when prompted and click on the Connect button

6. Once you’ve connected to the ESXi server, click the Create a new virtual machine button

7. Select the ESXi server and datastore from the Choose a Host and Datastore window and click the Continue button.


8. Select a hardware version from the Choose a Hardware Version drop-down menu and click the Continue button.

9. Select the guest operating system for the virtual machine and click the Continue button.

In this case, I’m selecting OS X 10.10.x

10. Configure the virtual disk by creating a new virtual disk or use an existing virtual disk. If you create a new virtual disk, use the disk size slider to specify the size of the virtual disk and specify the bus type.

In this case, I’m selecting to create a new disk and specifying SATA for the bus type.

11. Once your choices are complete, click the Continue button.
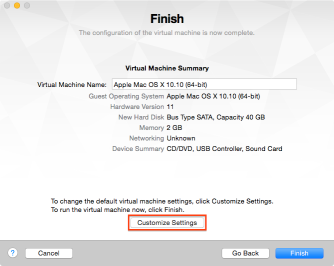
12. The Finish window displays.
At this point, the VM should be ready to go. However, as mentioned earlier, there may be an issue with the VM’s network interface not being created correctly.
You should be able to check for this from the Finish window by checking the Networking entry. If it says Unknown, that means that the VM’s network interface did not get created correctly.

To fix this, please follow the procedure described below.
1. In the Finish window, click the Customize Settings button

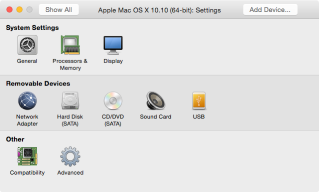
2. In the VM settings, select Network Adapter

3. In the Network Adapter settings, click the Remove Network Adapter button

4. Confirm that you want to delete the existing network adapter by clicking the Remove button.

5. Verify that Network Adapter no longer appears in the VM settings, then click the Add Device… button

6. In the Add Device window, select Network Adapter

7. Once Network Adapter has been selected, click the Add… button.

8. In the VM settings, verify that Network Adapter has been added.

9. Select Network Adapter in the VM settings.
10. In the Network Adapter settings, click the Generate button to create a new MAC address for the network adapter.

11. Verify that a MAC address is now being displayed in the MAC Address: entry.

At this point, you may also want to make other changes to the VM settings like increasing memory or adding processors, but that’s up to you.

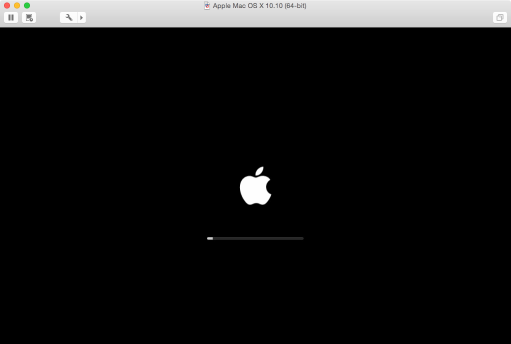
Once all changes have been completed, you should be able to boot the VM.
